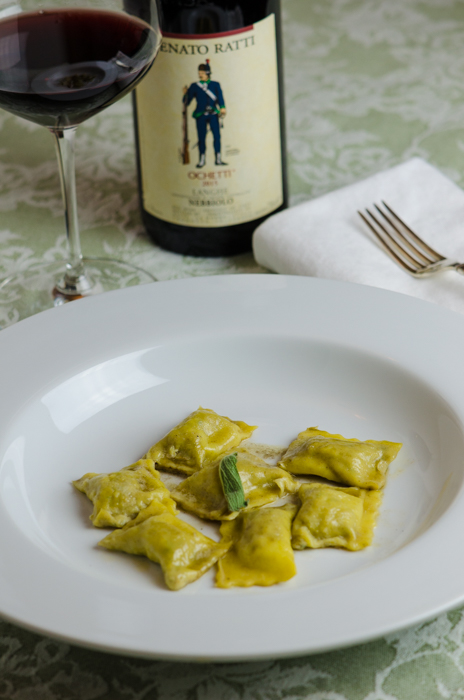
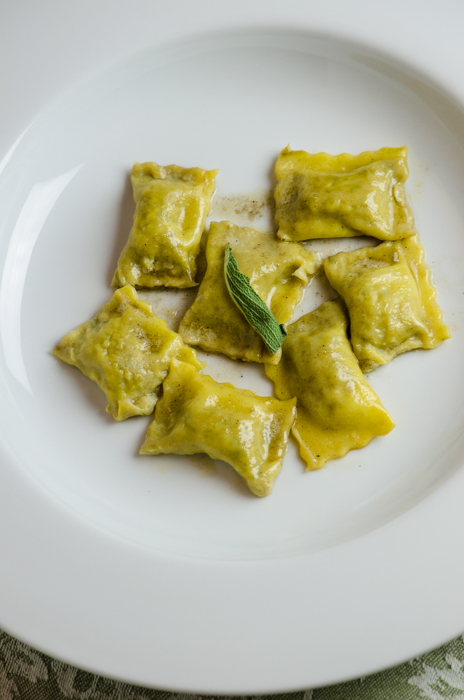
 I recently returned to the lovely Italy region of Piedmont to continue to research for our Barolo Walk and Wine Piedmont Walking tour. I recall my very first trip to the region, and my first taste of the local stuffed pasta, agnolotti, and their bright orange color. I soon discovered the source of this color was the intense orange of the egg yolks, which are the only part of the egg used in this pasta.
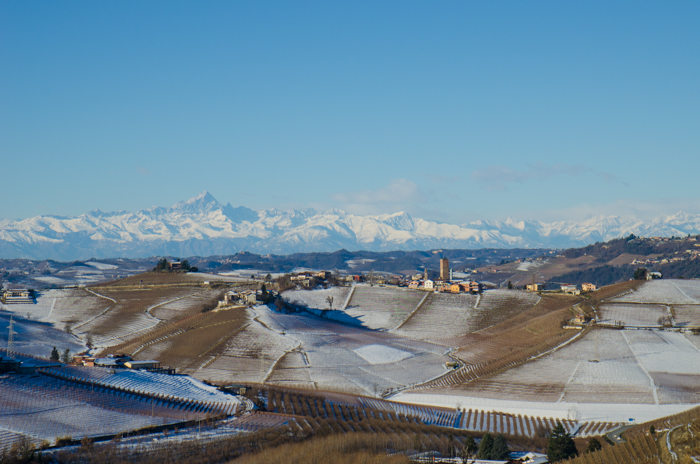 I still indulge in this dish on every visit to the area, and finally created it here in my home kitchen to share with my family during the holidays. I referred to several authentic traditional recipes as I developed this recipe, but most of these skimp on instructions – they assume you already are well familiar with the process of making pasta. So I have included more details, and the recipe for the egg yolk pasta is from the French Laundry cookbook by Thomas Keller.
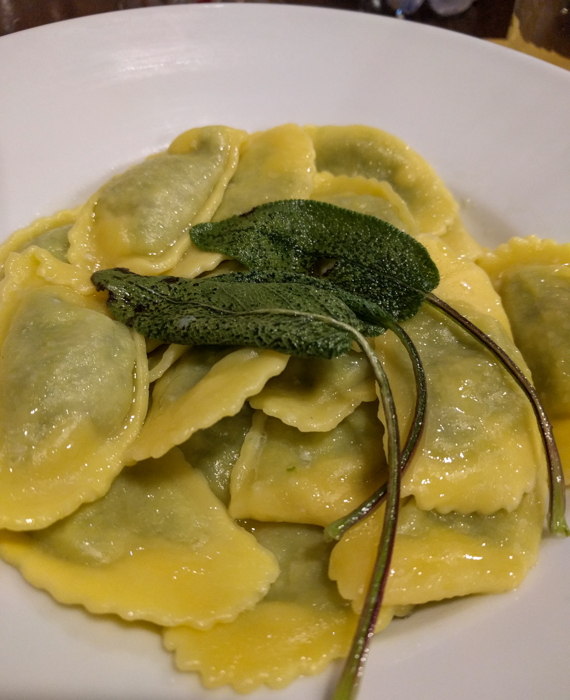 But the description of the dish itself from one cookbook I purchased in Italy provides a nice history of this local favorite. It begins by referring to one legend on the origins of this pasta, attributing it to a French chef in Torino. But the authors continue:
“But I am not so willing to accept the origins of this dish as attributed to the French chef mainly because agnolotti have been a part of the cuisine of this region for too many generations, and in a wide variety of versions, practically one for each Langhe village and farmhouse. For a long time this dish was probably served as the single-course main Sunday meal, and over time a rare balance of flavors was achieved: the gravy from the roast meat was the sauce for the agnolotti while the meat itself was used in the filling.
In the highest and poorest part of the Langhe, where veal or pork were often not available for economic reasons, they substituted pork and veal with barnyard rabbit, which was cooked and boned, and then used both for the filling and the sauce. This is a delicious variation and has a delicate, yet not by any means insubstantial flavor, and was skillfully prepared by the Langhe women.
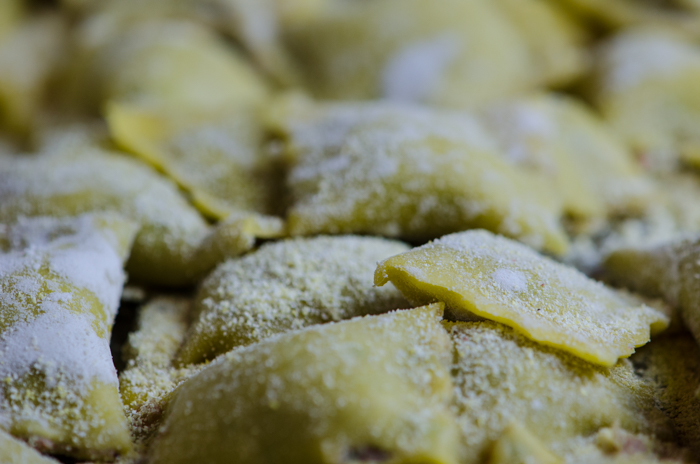 The form and the texture of the pasta can also be varied (quite thick, thin, or extremely thin) and the shape can be square as is the tendency in Alba, slightly rectangular or “pessia”, or “del plin” (pinched) in the hilly area from around Alba into the High Langhe area. They are all perfect, tasty, and have a well-balanced filling which requires careful preparation.
My father taught me how to appreciate agnolotti with wine: put about a dozen freshly drained steaming agnolotti into a bowl and cover them immediately with Dolcetto wine, fishing them out one at a time with your fork.”
Nonna Genia, by Beppe Lodi and Luciano De Giacomi
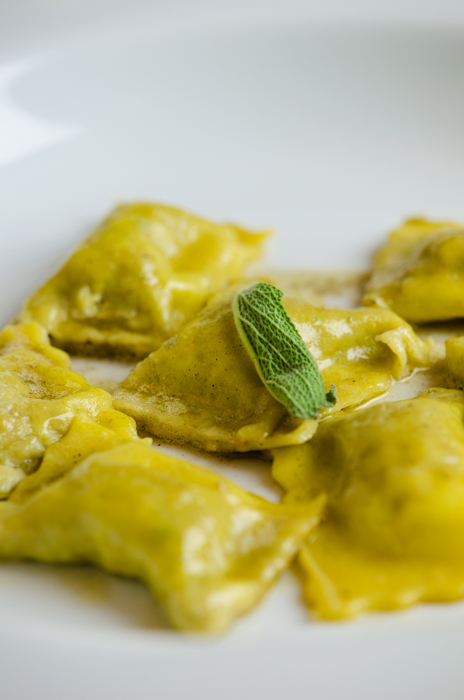 Agnolotti del Plin
Serves 8 – 10 as an appetizer, 6 – 8 as a main course
For the pasta:
1 3/4 cups (8 ounces) all-purpose flour
6 large egg yolks
1 large egg
1 1/2 teaspoons olive oil
1 tablespoon milk
For the filling:
9 oz. mixed meats – veal, pork, beef, lamb. Either cut into 1-inch cubes, or you can use ground meats
4 tablespoons extra virgin olive oil
1 small onion, diced
1/2 cup red wine
2 cups loosely packed baby spinach, coarsely chopped
1/4 tsp. sherry vinegar
1 egg
3/4 cup freshly grated Parmigiano-Reggiano cheese
1 1/2 tsp. grated nutmeg
Kosher salt and freshly ground pepper, to taste
For the sauce:
Semolina flour for dusting
8 Tbs. (1 stick) (4 oz./125 g) unsalted butter
4 whole sage leaves, plus more for garnish
Freshly grated Parmigiano-Reggiano cheese for finishing
To make the ravioli dough:
Mound flour on a clean flat surface and create a well in the center, pushing the flour to all sides to make a ring with sides about 1-inch wide. Make sure that the well is wide enough to hold all the eggs without spilling.
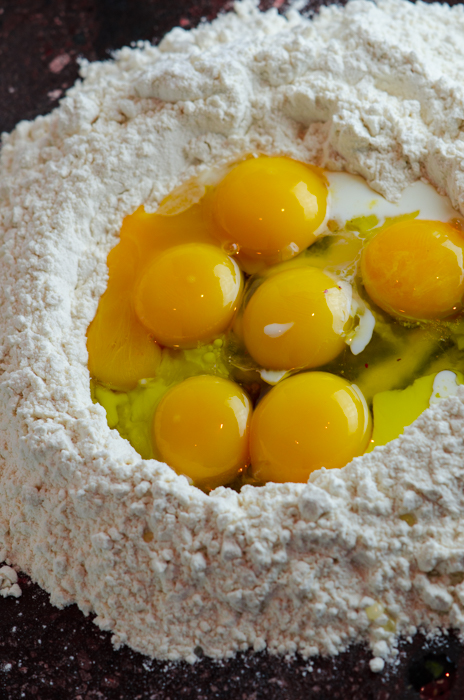 Pour the egg yolks, egg, oil and milk into the well. Use your fingers or a fork to break the eggs up. Still using a fork or your fingers, begin turning the eggs in a circular motion, keeping them within the well and not allowing them to spill over the sides. Using this circular motion, gradually pull in flour from the sides of the well; it is important that the flour not be incorporated into the eggs too rapidly, or dough will be lumpy. Keep moving the eggs while slowly incorporating the flour. Using a pastry scraper, occasionally push the flour toward the eggs; the flour should be moved only enough to maintain the gradual incorporation of the flour, and the eggs should continue to be contained within the well. The mixture will thicken and eventually get too tight to keep turning with your fingers.
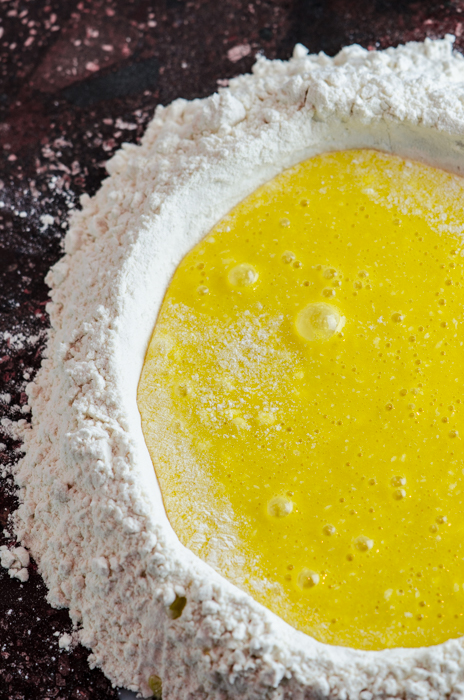 When the dough begins thickening and starts lifting itself from the board, begin incorporating the remaining flour with the pastry scraper by lifting the flour up and over the dough that’s beginning to form and cutting it into the dough. When the remaining flour from the sides of the well has been cut into the dough, the dough will still look shaggy. Bring the dough together with the palms of your hands and form it into a ball. It will look flaky but will hold together.
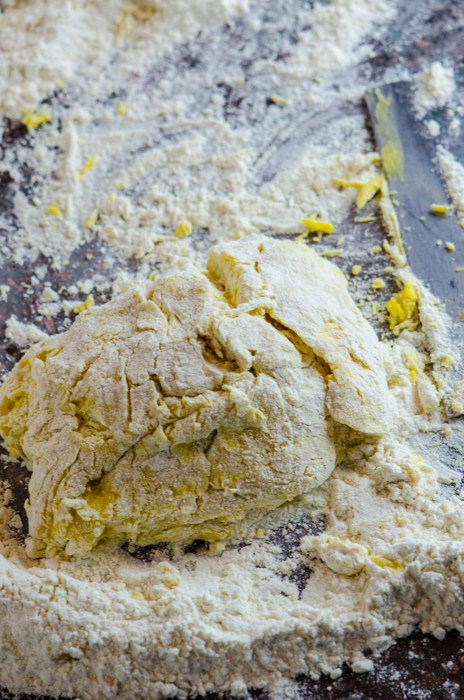 Knead the dough by pressing it, bit by bit, in a forward motion with the heels of your hands rather than folding it over on itself as you would with a bread dough. Re-form the dough into a ball and repeat the process several times. The dough should feel moist but not sticky. Let the dough rest for a few minutes while you clean the work surface.
Dust the clean work surface with a little flour. Knead the dough by pushing against it in a forward motion with the heels of your hands. Form the dough into a ball again and knead it again. Keep kneading in this forward motion until the dough becomes silky smooth. The dough is ready when you can pull your finger through it and the dough wants to snap back into place. The kneading process can take from 10 to 15 minutes.
Even if you think you are finished kneading, knead it for an extra 10 minutes; you cannot over-knead this dough. It is important to work the dough long enough to pass the pull test; otherwise, when it rests, it will collapse.
Double-wrap the dough in plastic wrap to ensure that it does not dry out. Let the dough rest for at least 30 minutes and up to 1 hour before rolling it through a pasta machine. The dough can be made a day ahead, wrapped and refrigerated; bring to room temperature before proceeding.
To make the filling:
Heat 2 tablespoons of the olive oil in a medium sauté pan over high heat. Add the mixed meats and cook, stirring occasionally, until the meat is caramelized and deeply browned, about 5 minutes. Remove the meat and set aside.
In the same pan over high heat, add the remaining olive oil and the onion. Cook for about 4 minutes, scraping the bottom of the pan with a wooden spoon to release the caramelized meat bits, until the onions are golden brown, about 10 minutes. Add the red wine and cook until the pan is almost dry, 1 to 2 minutes. Add the spinach and cook until just wilted, about 1 minute. Add the vegetables to the meat, and allow to cool.
Combine the onion mixture with the browned meat in a bowl and stir until well incorporated. Put the warm meat mixture into a food processor to grind it to a smooth texture or chop it as finely as you can by hand.
Once the meat is ground, add the vinegar, egg, Parmigiano-Reggiano and nutmeg and season with black pepper and salt. Mix well.
To form the agnolotti:
To roll out the pasta using a pasta machine, divide the dough into 4 – 6 pieces. You will roll out one piece at a time, while rolling keep the remainder covered with plastic wrap so it does not dry out. Lightly flour the machine rollers, the work surface around the machine, and the first piece of dough. Set the rollers at the widest setting. Flatten the dough into a disc, sprinkle with flour, then feed the disc into the space between the two rollers. Feed the dough through with one hand, while holding the upturned palm of your hand under the sheet emerging from the rollers. Keep your palm flat to protect the dough from punctures by your fingers.
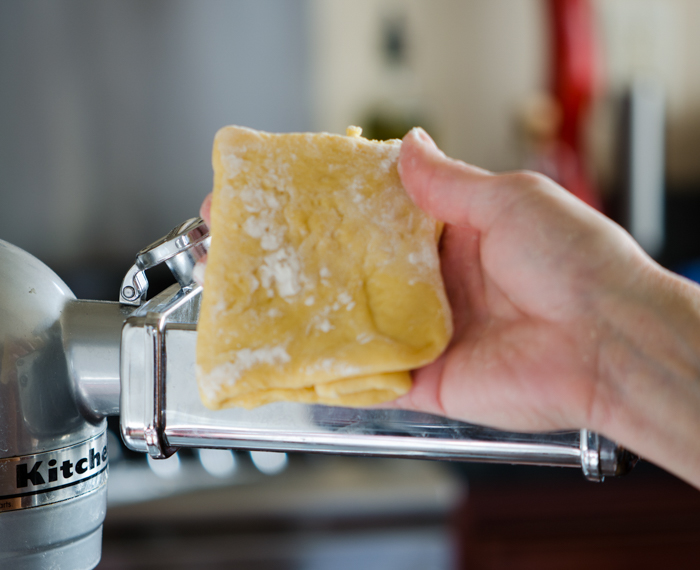 As the sheet emerges from the rollers, guide it away from the machine with your palm. Pass the dough through the rollers five to six times, folding it into thirds and flouring it each time. Then set the rollers at the next narrower setting and pass the dough through three times, folding it in half each time. Repeat, passing it through three times at each successively narrower setting. Repeated stretching and thinning builds up elasticity making especially light pasta. If the sheet becomes too long to handle comfortably, cut it in half or thirds and work the pieces in tandem.
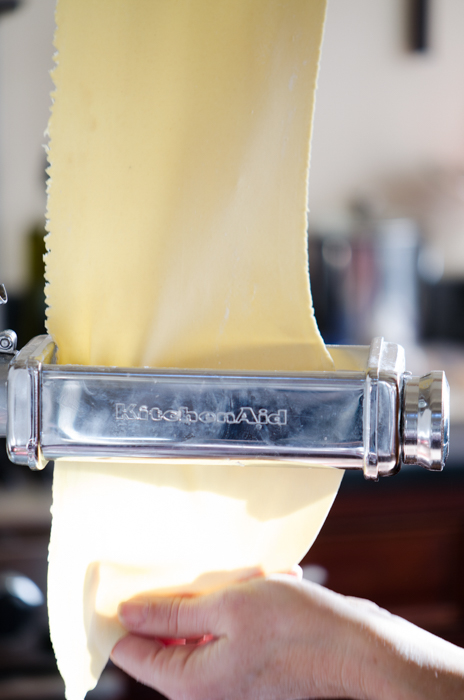 Don’t worry if at first the dough tears, has holes, is lumpy, or is very moist. Just lightly flour it by pulling the dough over the floured work surface. Take care not to overdo the flouring, or the dough may get too stiff. As you keep putting it through the rollers, it will be transformed from slightly lumpy and possibly torn to a smooth, satiny sheet with fine elasticity.
Different machines have different numbers of settings. These ravioli use the thinnest setting on a machine, which will be thin enough for you to see color and shape through it; this is perfect for lasagna and filled pastas. If it is so thin that the dough tears easily, however, stop at the next to last setting.
Place the pasta sheets on a floured sheet pan, separated by deli paper or plastic wrap. Cover the pile with a slightly damp towel.
To fill the agnolotti:
Dust 2 baking sheets with semolina flour and set aside.
Work with one sheet of pasta at a time, keeping the remaining sheets covered so they do not dry out.
Lay the pasta sheet on a lightly floured work surface with a long side facing you. Trim the edges so they are straight. Place the agnolotti filling in a pastry bag fitted with a 1/2 inch plain tip, or if you don’t have a pastry bag, you can use a resealable plastic bag, cutting off a bottom corner to make a 1/2 inch opening. Pipe a “tube” of filling across the bottom of the pasta sheet, leaving a 3/4 inch border of pasta along the left, right and bottom edges.
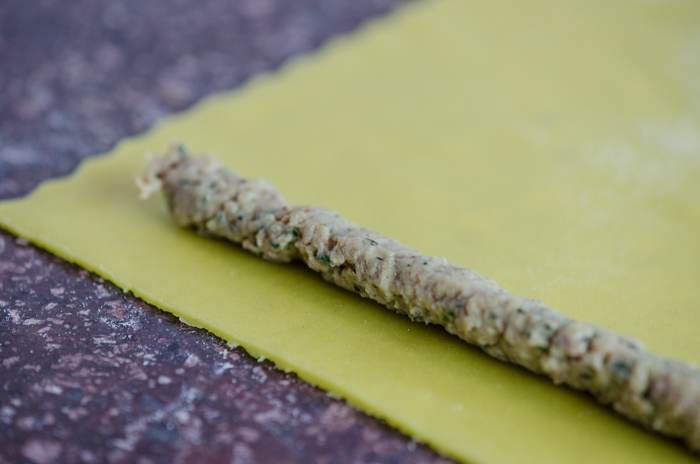 Pull the bottom edge of the pasta up and over the filling and pressing lightly with your index finger to seal the edge of the dough to the pasta sheet; don’t drag your finger along the dough to seal or you risk ripping the dough. When it is sealed, there should be about 1/2 inch of excess dough visible above the tube of filling (where you sealed it). Be certain that you are sealing tightly while pressing out any pockets of air. Seal the left and right ends of the dough.
 To shape the agnolotti
Starting at one end, place the thumb and forefinger of each hand together as if you were going to pinch something and, leaving about 1 inch of space between your hands and holding your fingers vertically , pinch the filling in 1-inch increments, making about 3/4 inch of “pinched” area between each pocket of filling. It is important to leave this much “pinched” area between the agnolotti, or when the agnolotti are separated, they may com unsealed.
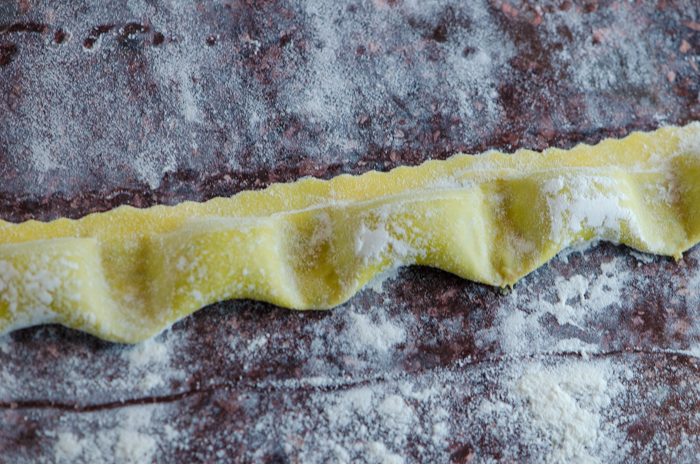 Run a crimped pastry wheel along the top edge of the folded-over dough, separating the strip of filled pockets from the remainder of the pasta sheet. Don’t cut too close to the filling, or you risk breaking the seal. Separate the individual agnolotti by cutting through the center of each pinched area, rolling the pastry wheel away from you. Working quickly, place the agnolotti on a baking sheet dusted with a thin layer of cornmeal, which will help prevent sticking. Don’t let the agnolotti touch each other or they may stick together.
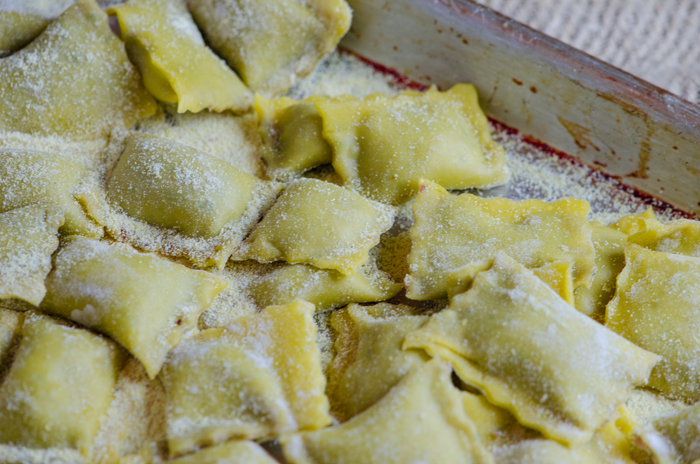 Repeat the same procedure on the remainder of the pasta sheets. Either cook the agnolotti immediately in boiling water, or place the baking sheets in the freezer. Once the agnolotti are frozen, place them straight into airtight freezer bags and keep them frozen for up to several weeks. Cook the agnolotti while still frozen.
To serve:
Melt butter in a large saute pan. Add the sage and cook for 1 minute. Add the cooked agnolotti, stir to combine and heat everything, Place into serving bowls and finish with grated Parmigiiano-Reggiano and sage. Serve with one of the amazing wines from the region, like a Nebbiolo from Langhe.
