Valpolicella (and a Classic Italian Meat Ragu)

valpolicella vineyards bike wine tours italy italiaoutdoors food and wine
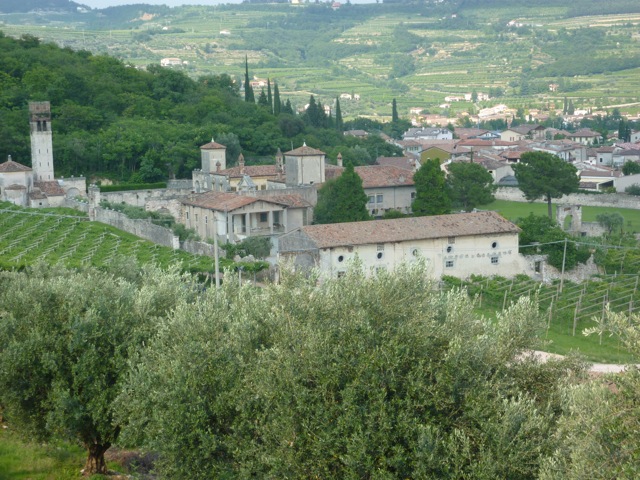
Valpolicella vineyards

My blog is entitled “Northern Italian Food and Wine”, but I have to admit I’ve been negligent in the wine department. I’ll begin here to rectify that. The Veneto region is one of the most productive wine regions Italy, both in terms of quantity and quality of wines. You will find internationally known wines such as Amarone and Prosecco, as well as several equally good but less renowned wine districts such as Colli Euganei and Colli Berici. Today I’ll talk a bit about the Valpolicella wines, a wine that most of us in the US can find in our local shops, but many of us are unfamiliar with it and pass it by in favor of a Tuscan Chianti.
biking through vineyards cycling tours dolomites
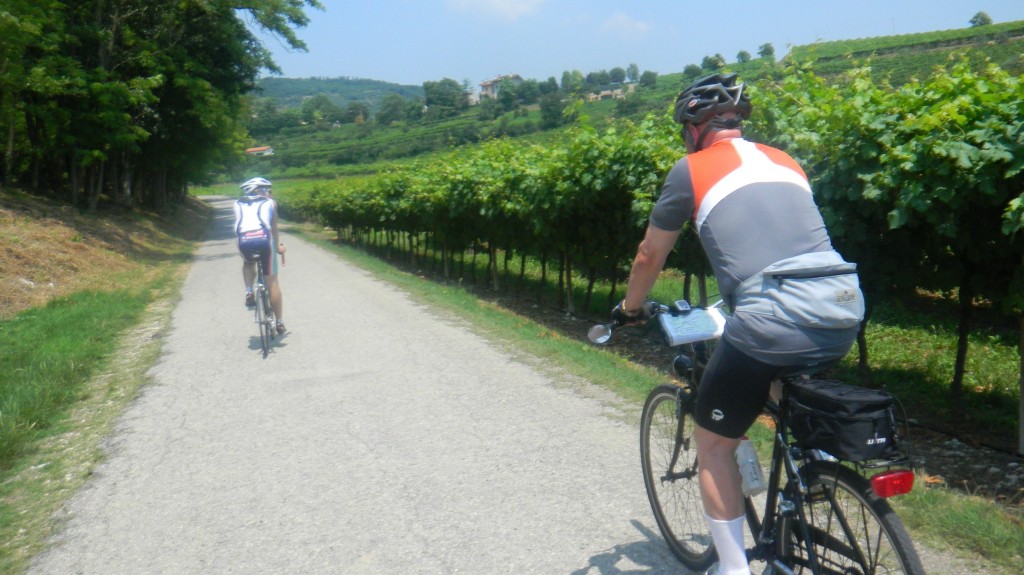
Biking through vineyards

The Valpolicella wine zone is located in the province of Verona, east of Lake Garda, and north of the Adige River. The hills in this region are used for agriculture (predominately grapes, of course) as well as marble quarrying. The volcanic hills and alluvial valleys along the rivers here in this region provided a variety of terroir for the cultivation of wine grapes. My day job, Italiaoutdoors, is introducing a week long bike tour through the wine regions of the Veneto next season, and Valpolicella is a must-see (and must-taste) along the way.

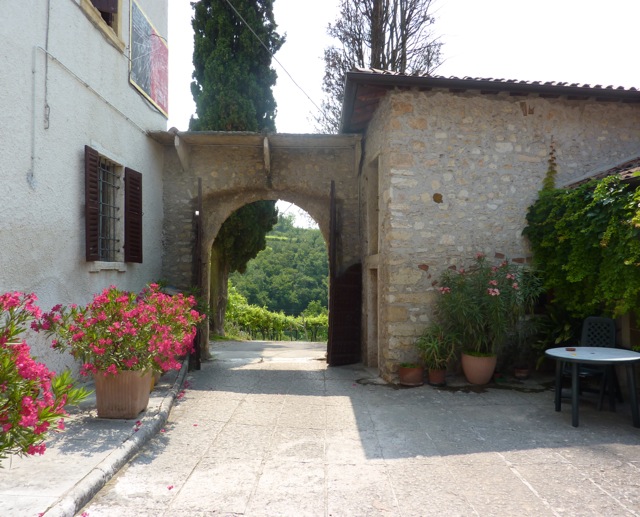
winery in valpolicella custom cycling holidays italiaoutdoors food and wine

Winemaking in Valpolicella dates back to at least the times of the ancient Greeks. The Valpolicella and Amarone tradition of using dried grapes, in which ripened grapes are dried to concentrate the sugars (initially on the vine, but today in well-ventilated rooms),  was known as the “Greek style” of wine production. Roman writers such as Cassiodorus refer to wines from this region, and during the Venetian trading period with the Byzantine Empire, one of the products regularly transported were wines from Valpolicella. The name itself, Valpolicella, comes from Latin and Greek, and means “valley of many cellars”.

Winemaking in Italy in the late 1800s experienced a series of challenges – phylloxera and other blights devastated many grape harvests, and various political upheavals related to Risorgimento (the unification of the many disjointed regions that produced Italy as we know it today) and later, World War I. Valpolicella emerged from all of this in better shape than many other wine regions in Italy. In the 1950‘s, the dried grape Amarone tradition was reintroduced to the area, and in 1968 Valpolicella received its own DOC (Denominazione di Origine Controllata) official quality recognition.

valpolicella wine bike tours italy italiaoutdoors food and wine

The DOC designation did have its downside, as it was accompanied by a large expansion of the vineyards that were to be included in the DOC region. Many of these areas were down on the flat, more fertile plains. Good grapes need to work a bit to survive, and although the yield increased in the plains, the quality of the grapes decreased. Also, the DOC allowed the use of lower quality blending grapes such as Rondinella and Molinara. The costs of growing grapes in the original hillside fields became more expensive, and many of these were abandoned. The result of these trends was a lower quality wine, and the price and sales of Valpolicella decreased accordingly.

This trend was reversed in the 80s and 90s due to the wine industry’s rediscovery of Amarone. The demand for this wine increased significantly, and the grapes used for its production began to command premium pricing. Now, it became profitable again to return to cultivate these high altitude locations, even with their lower yields. The region began to attract new winemakers, who brought with them advanced techniques and improvements in viticulture. These innovations found their way into the production of Valpolicella. Also, in 2003 the DOC elected to do away with the mandatory requirements for blending, so the use of poorer quality blending grapes is no longer necessary.

In December of 2009, the original Valpolicella hillside production zone received the highest quality wine designation available in Italy, the DOCG (Denominazione di Origine Controllata e Garantita.) Today, this DOC ranks second in Italy in total production, behind Chianti.

The predominant grape in Valpolicella wine is the Corvina grape, optionally blended with the following: Rondinella, Molinara, Corvinone, Rossignola, Negrara, Barbera, Sangiovese, even the indigenous grape Oseleta. There are several different styles of Valpolicella wines, ranging from light to full-bodied, dry to sweet to sparkling.

Valpolicella DOC: a lighter bodied wine, similar in style to a Beaujolais, and served young. A tart, sour cherry type flavor, with a lower alcohol level of around 11%.

Valpolicella Classico DOC: a Valpolicella from the ‘classic’, or original hillside vineyards.

Valpolicella Classico Superiore DOC: To earn the Superiore designation, the wine must be aged at least 12 month in wood, and reach an alcohol level of 12%.

Recioto della Valpolicella DOC: The name ‘recioto’ comes from ‘recie’, meaning ears in the local dialect. The ‘ears’ of the grape bunch are those lobes on the top, which receive the most sunlight, and are therefore riper and drier, with more concentrated sugars. These are separated from the remainder of the bunch, and are used to produce this sweet dessert wine. Today, this process is a bit more efficient, as the entire bunch is picked and the grapes are air dried in a room to concentrate the sugars.

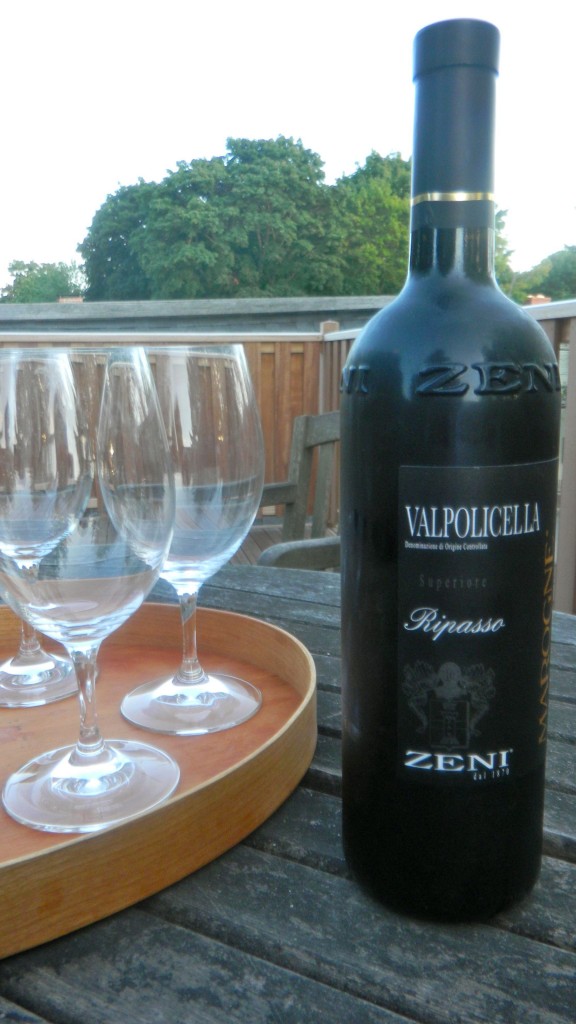
Ripasso della Valpolicella DOC: Another new innovation in wine production, introduced by Masi in the early 1980’s. Here, the leftover grape skins and seeds from the Recioto and Amarone fermentation process are added to Valpolicella, and the mixture is allowed to macerate for an extended period of time. Ripasso della Valpolicella wines are fuller-bodied, with a higher alcohol content. Today, most Amarone producers produce a Ripasso wine as well, and the Ripasso wine was also awarded its own DOC status in 2009.

Valpolicella pairs well with cured meats such as prosciutto and sopressa as well as firm cheese like pecorino and grana. It complements pork and veal dishes, as well as pizzas with meat toppings and pastas, polentas and risottos with meat ragus. It also goes well with berries and cherries.

This meat ragu recipe we made during a recent cooking class to top homemade potato gnocchi. It also goes well over any sort of pasta. Open a nice bottle of Valpolicella and enjoy!

Classic Italian Meat Ragu

This is a classic italian meat sauce, which you will see all over the country. Each region will have a slightly different version of it; for example, the Bolognese sauce (from Bologna, of course) uses white wine, and adds cream and milk. I use whatever meat I can find, and believe the more types of meat, the better it tastes. I’ll often cut up leftover steak, or pork, or even chicken and turkey and add it to the mix. It becomes a great way to use up leftover meat.

Serves 4

2 tablespoons extra virgin olive oil
3 ounces pancetta or bacon, diced
1 onion, cut into 1/4 inch dice
1 celery stalk, peeled and cut into 1/4 inch dice
1 carrot, peeled and cut into 1/4 inch dice
1/2 pound ground pork
1/2 pound ground beef
1 cup dry red wine
2 cups beef broth
1 teaspoon tomato paste
1 cup diced canned plum tomatoes
Kosher salt and freshly ground pepper

Heat the oil in a saucepan over medium heat. Add the pancetta, onion, celery, and carrot and cook until softened, about 7 minutes.

Raise the heat to medium high, and add the pork and beef and brown. Add 1/2 cup of the wine, and let it cook down, scraping the bottom of the saucepan to loosen the browned bits as it cooks off. Add 1/2 cup of the beef broth. Allow this to cook off, then add the remaining wine, tomato paste, and another 1/2 cup of the broth. Cook until the liquid is almost gone.

Add the tomatoes and the remaining broth, and simmer for 1 hour. The ragu should be quite thick. Season with salt and pepper and serve over cooked pasta or gnocchi.
Posted in Meats, Pasta, Uncategorized | Tagged , , , , , , , , , , , , , , , , , , , , , | 1 Comment

Parsnip Soup with Apple Puree

parsnip soup cycling tours dolomites italiaoutdoors food and wine
Parsnip Soup with Apple Puree

Parsnips are a great root vegetable, white and similar in shape to a carrot, long and tapered. It is a relative of celery root, parsley root, and carrot, and the taste is a combination of the sweetness of a carrot, with the herbal flavors of the celery and parsley roots. It was cultivated in ancient times in Italy; Emperor Tiberius brought them to Rome from France and Germany. However, today parsnips are rarely found on Italian tables. They do need a cold spell to develop their sweetness, and only in Northern Italy does the weather cooperate.

They are cultivated in Emilia Romagna, but rather than playing a role in the local cuisine, they are used as fodder for the pigs in Parma. In this way, this overlooked vegetable contributes to the great flavor of the renowned Prosciutto di Parma of the region.

ingredients luxury villa tuscany italiaoutdoors food and wine
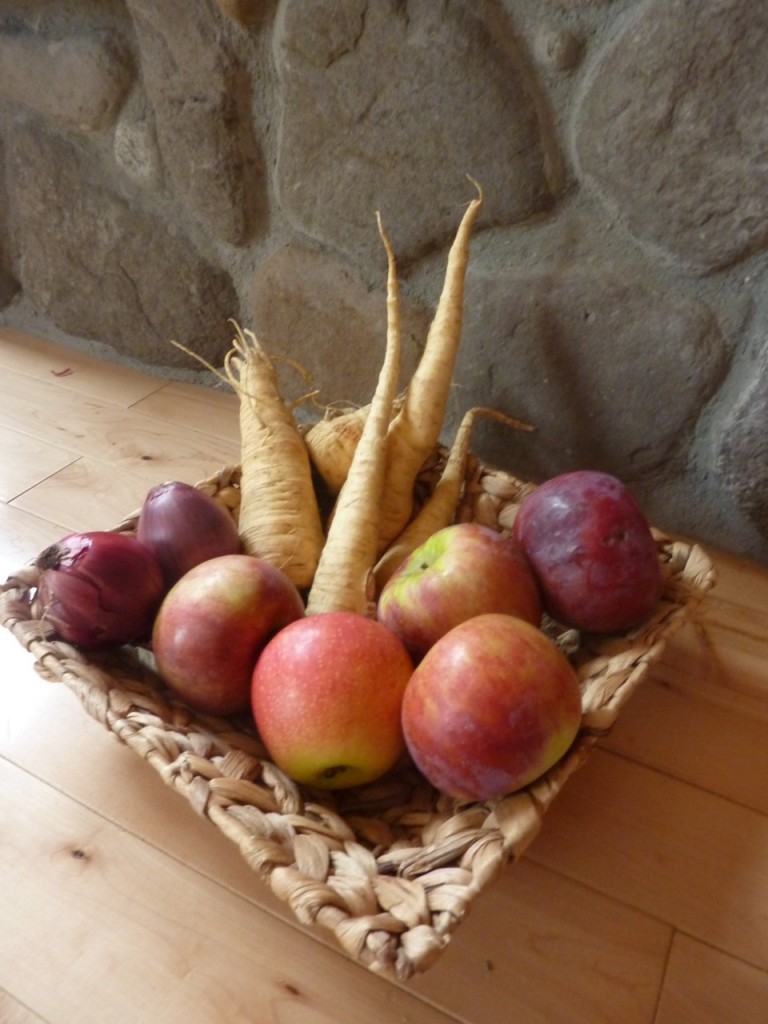
Parsnips and Apples

The Trentino region of Northern Italy, home to the Dolomites and a great area Italiaoutdoors explores either by bike or by visiting the many amazing ski resorts, produces 1 out of every 5 apples eaten in Italy. The apples from the Val di Non have been awarded their own DOP status, an Italian award recognizing the quality assurance process followed by the producers of this product. In this recipe, a large spoonful apple puree (applesauce to most of us American home cooks) is swirled in the soup to add a nice fruity sweetness that pairs well with the vegetal flavors of the soup.

This soup could be made with a variety of different root vegetables, so when you are in Italy and have a hard time finding parsnips, you could substitute carrots, winter squash, celery root, or even a combination. If you are using parsnips, look for small to medium one that are firm, not rubbery. Larger parsnips may have a woody center.

Parsnip Soup with Apple Puree

Serves 4

For the soup:

1 tablespoon extra virgin olive oil
2 slices bacon
1 small onion, chopped into 1/4 inch dice
5 medium parsnips, peeled and sliced into 1/2 inch slices (or 5-6 large carrots, 2 celery roots, 1 large butternut squash, or a combination)
6 cups chicken stock
1/2 cup heavy cream
kosher salt and freshly ground pepper

For the apple puree:

5 apples, peeled, cored and quartered

For optional parsnip chip garnish:

1 parsnip, peeled and sliced very thin
1 cup vegetable oil

Heat the olive oil in a medium stock pot and over medium high heat. Add the bacon and saute until just starting to crisp, about 4 minutes. Remove a spoonful or so from the pan and set aside for a garnish.

Add the onion and saute until softened, about 4 minutes. Add the parsnips and the chicken stock. Bring to a boil, reduce heat, and simmer until the parsnips are tender, about 15 minutes. Remove from heat.

To puree the soup, you can transfer the contents of the pot to a blender in batches and puree. Alternatively, if you have an immersion blender, you can use this to puree the soup in the stock pot it has been cooking in. Add the heavy cream.

At this point, you can adjust the soup to your desired consistency. If it is too thick, add a little water. If too thin, reduce over medium high heat until it is the consistency you prefer. Season with salt and pepper.

For the puree:

Place the apples in a large saucepan and cover with water. Bring to a boil over high heat, reduce to a simmer and cook until the apples are falling apart, about 20 minutes.

Puree the apples, either by scooping them out and placing them in a blender, or with an immersion blender directly in the saucepan. If you have pureed them in a blender, put the puree back in a saucepan. Continue to cook the puree over medium to low heat to eliminate as much of the water as possible, being careful to stir fairly frequently to prevent it from scorching on the bottom of the pan.

If making the parsnip chip garnish, place the vegetable oil in a medium saucepan and heat to 325° over medium high heat. Fry the parsnip slices in the oil until golden brown. Remove to a paper towel, and season with a bit of kosher salt.

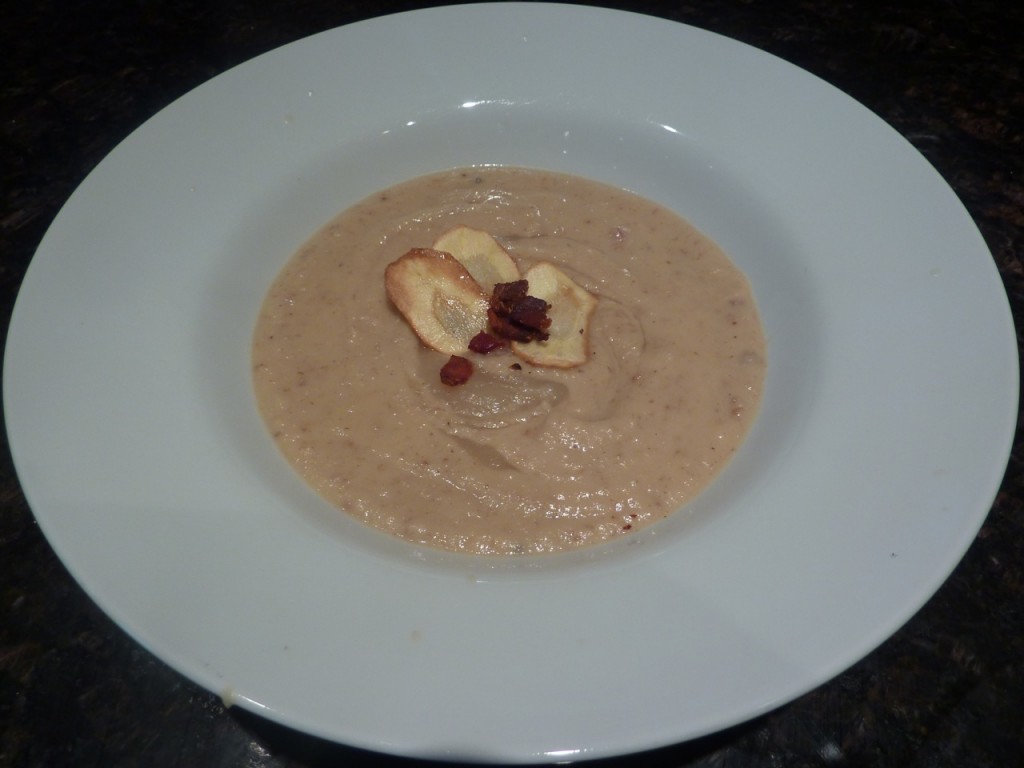
Pour the parsnip soup into four warmed soup bowls. Place a large spoonful of the puree in the middle of the soup and swirl it a bit with a table knife. You will have leftover puree, a nice applesauce side to your next pork dish! Top with parsnip chips and a sprinkle of bacon.

Posted in Parsnips, Soups, Uncategorized, Vegetables | Tagged , , , , , , , , , , , , , , , , , , , , , | 1 Comment

Gnocchi Class – Butternut Squash Gnocchi

cooking class culinary bike tours italy italiaoutdoors food and wine

My last post covered the standard potato gnocchi we made at my last cooking class. This one will address one of the myriad of variations that you see in Italy, a pumpkin or squash gnocchi. Although the basic technique is the same, working with pumpkin or squash is much different than potato due to the higher water content. The objective here is still the same, however, to use as little flour as possible to get light and tender gnocchi.

cooked squash cycling tours dolomites italiaoutdoors food and wine
Drying out squash

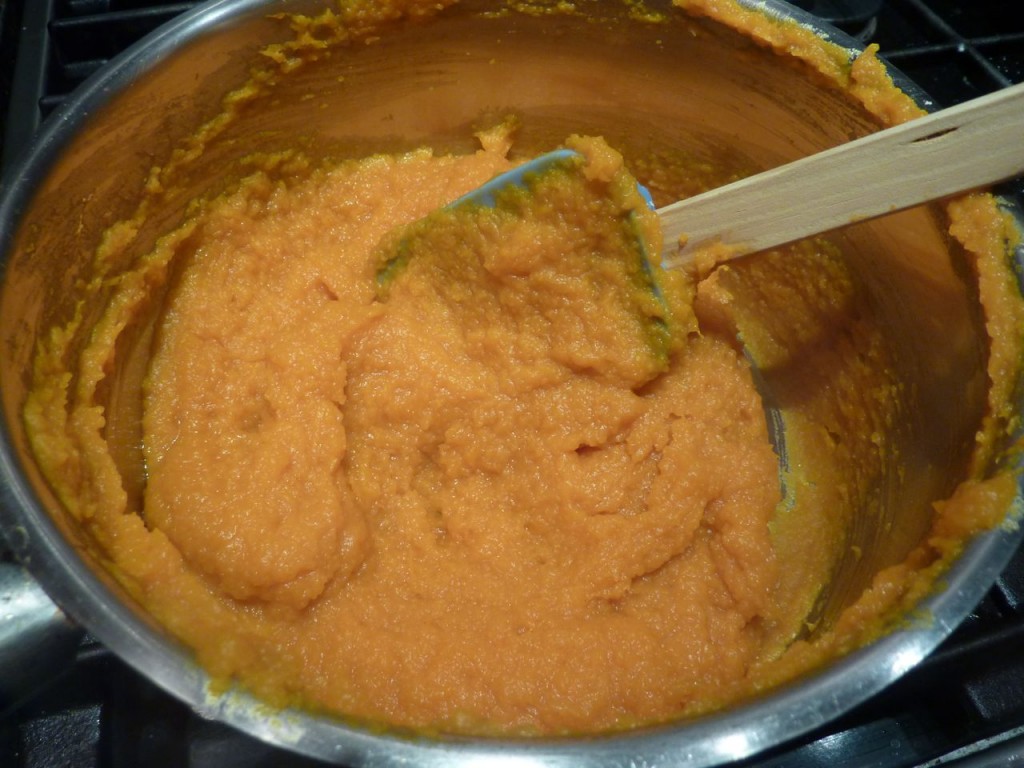
Winter squash were just starting to appear in the market during our last Italiaoutdoors bike tour of the season, and I arrived home to the US to find them in the local farmer’s market and my CSA. I have a big box of them in my garage now, and I thought using butternut squash rather than pumpkin would be worth a try. The squash, however, is quite a bit wetter than pumpkin so I ended up drying it out in a saucepan over medium heat, keeping a close eye on it to make sure it didn’t brown. This did take a bit of time.

At the class I review the recipes with everyone before we begin. I was asked whether you could ‘cheat’ and use canned pumpkin for the gnocchi rather than roasting the pumpkin or squash. You can, and I’ve supplied below two recipes for gnocchi, one with roasted butternut squash, the other with canned pumpkin. The squash took a bit of effort to dry it out enough to use it; the pumpkin I used straight out of the can. In the pumpkin recipe below, I replaced a bit of the all-purpose flour with buckwheat flour. Buckwheat is found fairly regularly in the northernmost regions of Italy, such as Trentino – we’ll be exploring some of those areas during our ski tours this season. It gives this gnocchi a nice, nutty touch.

gnocchi dough custom bike tours italy italiaoutdoors food and wine
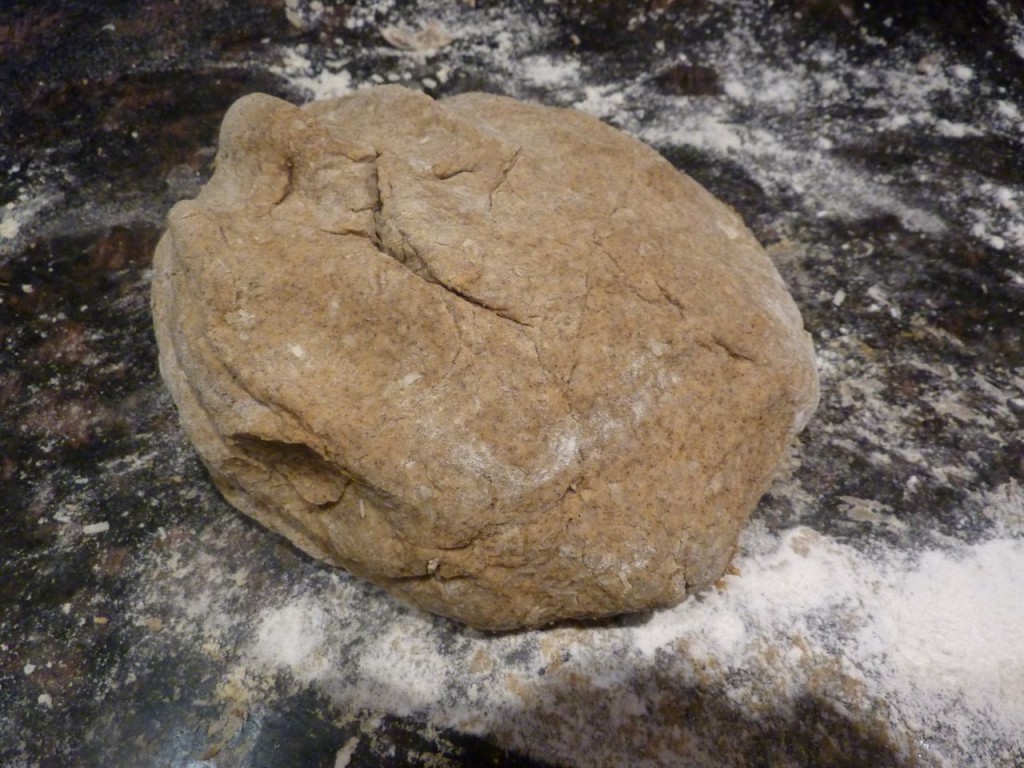
Sticky dough

For both versions, you will end up with a very sticky dough. Don’t be too intent on mixing in enough flour to make it easy to handle; remember the objective here is to add as little flour as possible as we want nice, light gnocchi. Be a little generous with using flour on the outside to allow you to handle the dough, but refrain from mixing it through. The interior should remain quite sticky, too sticky to handle easily. But I find that if I divide the dough into smaller pieces when I am rolling it into logs, and continue to use flour to coat the outside, I can form the gnocchi even though the interior is still quite moist.

Two recipes for gnocchi follow, as well as two ways of using them, one a mascarpone sauce, the other a baked gratin dish. A simple browned butter sauce with almonds would work as well. And both the mascarpone sauce and the baked gratin can be made with pasta rather than gnocchi.

squash gnocchi ski holidays dolomites italiaoutdoors food and wine
Butternut Squash with Mascarpone

Butternut Squash Gnocchi with Mascarpone Sauce

Serves 6 as a side

For the gnocchi:
2 1/4 pounds pumpkin or butternut squash
3/4 cup unbleached all-purpose flour, plus extra for dusting
1/4 cup freshly grated Parmigiano Reggiano
kosher salt
1/8 teaspoon freshly grated nutmeg
For the sauce:
2 shallots, minced
2 tablespoons unsalted butter
1/2 pound mascarpone
1/2 cup freshly grated Parmigiano Reggiano
kosher salt and freshly grated pepper
1 tablespoon minced flat-leaved parsley

To make the gnocchi:

Preheat the oven to 400°. Bring a large pot of water to boil over high heat. Season with salt.

Cut the squash in half lengthwise and scrape out the seeds. Lay skin side up on a baking sheet and bake for 40 minutes, or until tender. As soon as you can handle them, remove the skin, cut into large pieces and pass through a ricer. If the squash is wet, cook it in a saute pan, stirring frequently, until it is thickened. It should be the consistency of canned pumpkin.

Pour onto a counter. Add the flour, Parmigiano, salt and nutmeg, mix quickly into a dough. It should be pretty sticky. but you should be able to handle it when it is dusted with flour. Take a piece the size of a large olive and drop it in the boiling water. It will fall to the bottom, then rise to the surface. If it breaks up, you will need to add a bit more flour to the dough. Knead it in quickly and test again. Once it holds together, you can form the gnocchi.
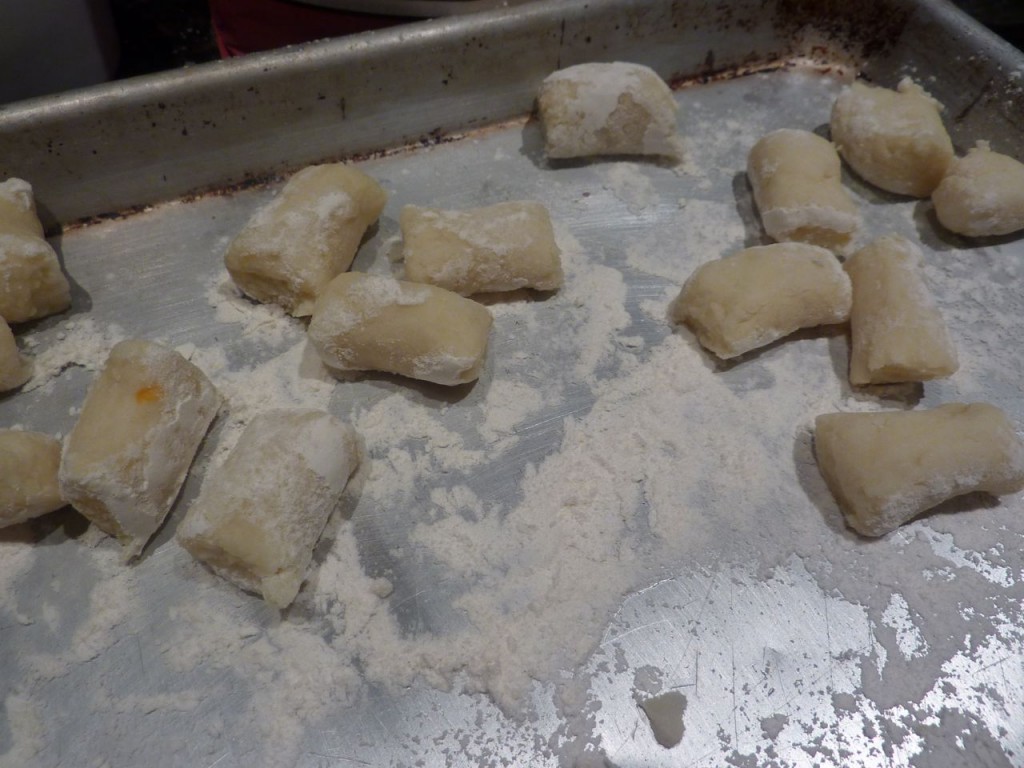
Divide the dough into 4 pieces. Roll each piece into 1/2 inch log. Cut into 1 inch long pieces and place on a floured sheet pan to keep them from sticking to each other. If they are not to be eaten immediately, you can freeze them at this point.
Drop the gnocchi into the boiling water in batches. As they rise to the surface, allow to cook a few more seconds, then remove with a slotted spoon. Place on a clean sheet pan.
To make the sauce:
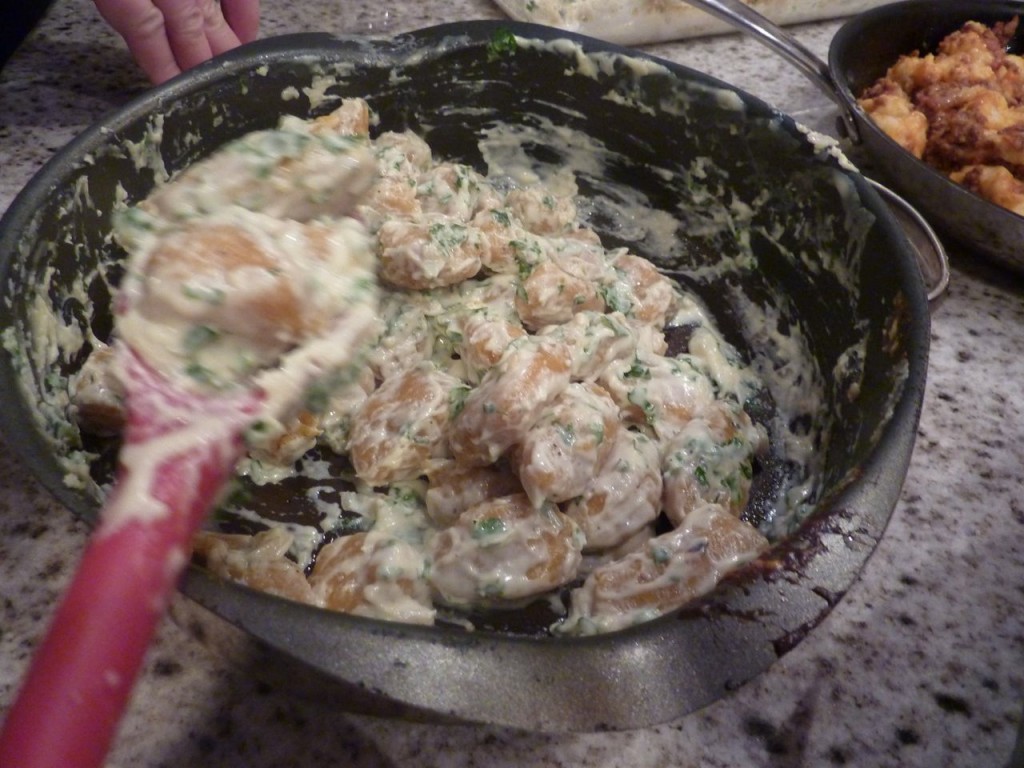
Saute the shallots in the butter for 3 minutes. Fold in the mascarpone, parmigiano, salt and pepper. Add the gnocchi. Cook over high heat, stirring, for 1 minute. Garnish with the parsley and serve.

buckwheat squash gnocchi europe cycling tours italiaoutdoors food and wine
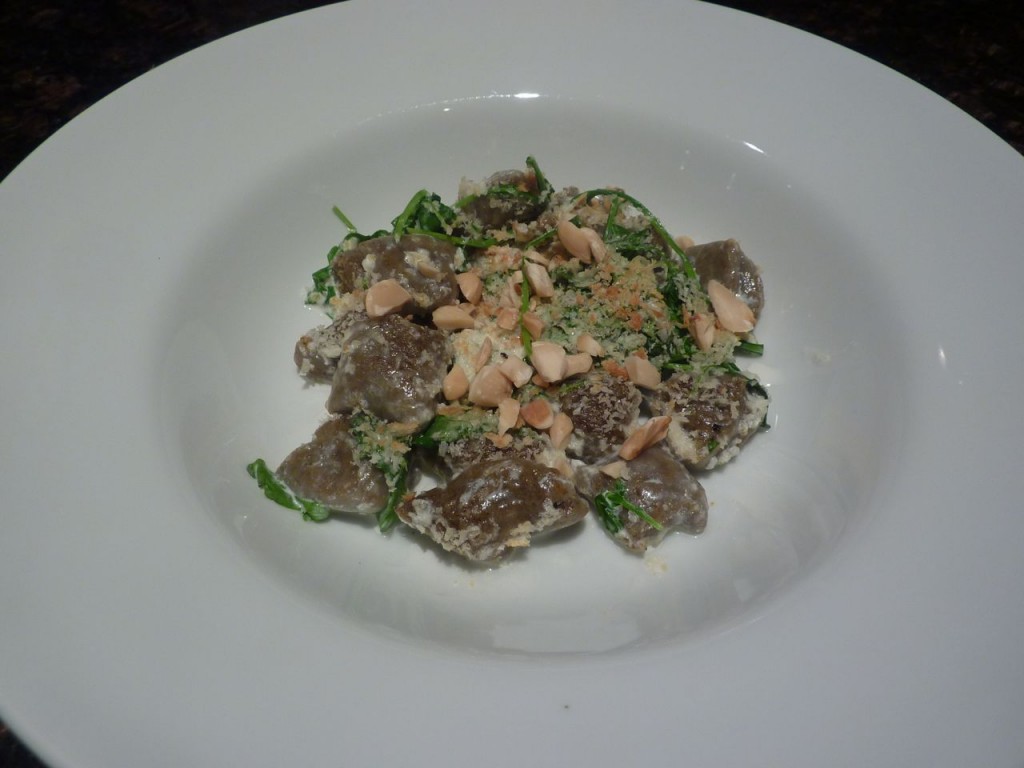
Pumpkin Buckwheat Gnocchi Gratin

Pumpkin Buckwheat Gnocchi Gratin

Serves 4 as a side

For the gnocchi:
1 15 oz. can pumpkin
1/2 cup buckwheat flour
3/4 cup all-purpose flour, plus more for dusting
1/2 cup grated parmigiano reggiano
2 teaspoons kosher salt
1/2 teaspoon nutmeg

For the gratin:
1 tablespoon butter
1 1/2 cups light cream
2 cups arugula
Kosher salt and freshly ground pepper
1/2 cup grated parmigiano reggiano
1/2 cup panko or bread crumbs
1/4 cup almonds, coarsely chopped

Bring a large pot of water to a boil. Season with salt.

Preheat the broiler.

Place all of the ingredients in a bowl or directly on the counter and mix together. You will have a very sticky dough. Place the dough on the counter, and using flour to keep it from sticking, form it into a large ball. You want to use as little flour as possible to keep the gnocchi light and tender, so don’t work the dough too much as it will continue to absorb flour. Coat it with just enough flour to allow you to handle it.

Take a grape-size piece of the dough and place it in the boiling water. It should sink, and then float to the surface. If it breaks apart, you will need to add more flour to the dough. If it sinks and then floats, you can form the gnocchi.

On a floured counter top, take about 1/4 cup of the dough and, using the palms of your hands, roll it out into a 1/2 inch (thumb size) log. The dough will be quite sticky, so you will need to coat your hands with flour. As this particular gnocchi dough is quite sticky, it is easier to do this if you do it in small amounts. Cut the log into 1 inch lengths and place the individual gnocchi on a floured sheet pan. Continue to shape all of the dough into individual gnocchi.

Working in batches so as to not overcrowd the pot, place the gnocchi in the boiling water. They will sink, and then rise to the surface when they are done; scoop them out with a slotted spoon and place on a clean sheet pan. At this point, they can be frozen if you are not using them immediately.

Coat the bottom and sides of a 13×9 baking dish. Place the gnocchi in the dish. Heat the cream in a medium saucepan until just simmering; add the arugula and cook just until wilted. Season with salt and pepper. Pour the cream mixture over the gnocchi, then top with the parmigiano reggiano and bread crumbs. Place under the broiler until the cheese and crumbs are golden brown. Top with chopped almonds and serve.

Posted in Mascarpone, Pasta, Pumpkin, squash, Uncategorized | Tagged , , , , , , , , , , , , , , , , , , | 1 Comment

Gnocchi Class

cooking class cuinary cycling holidays europe

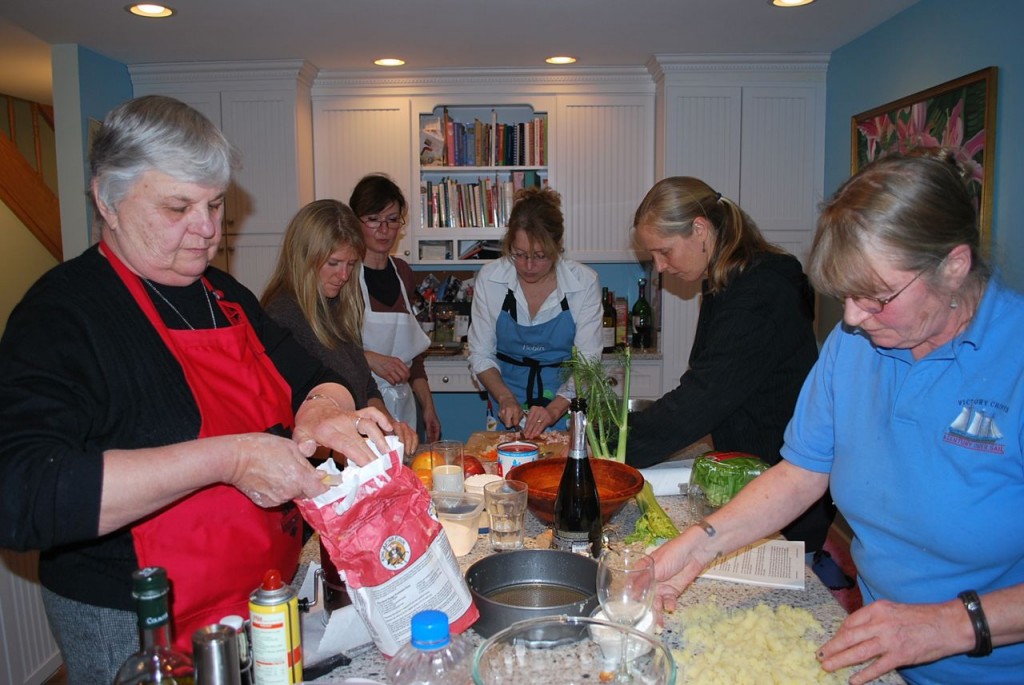
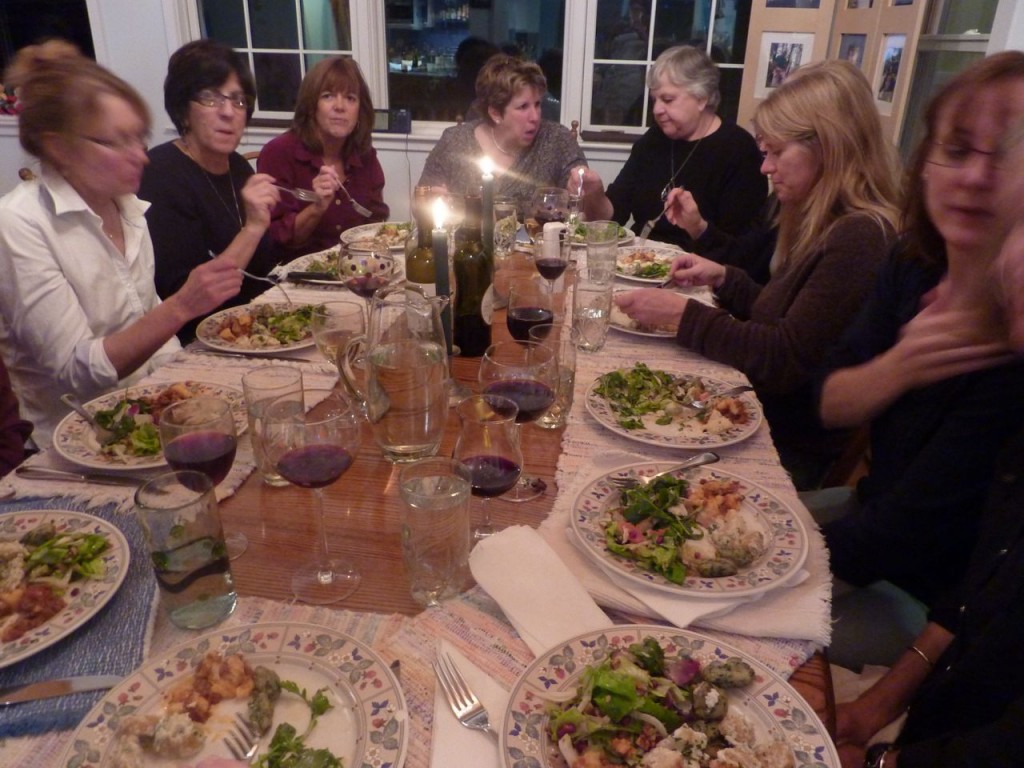
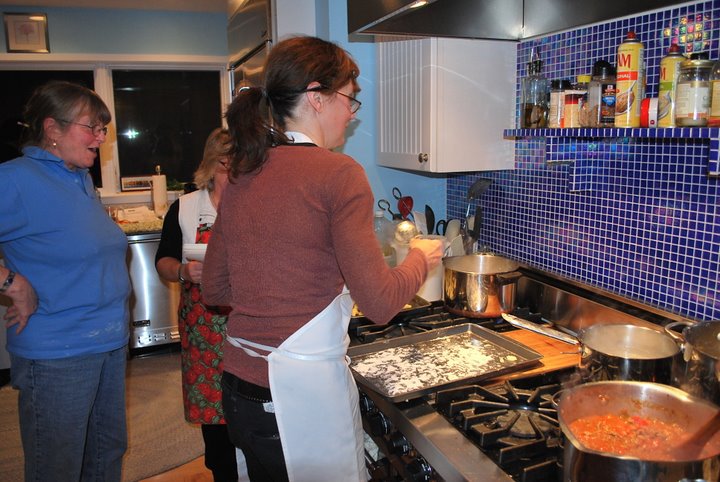
I ran a cooking class last night for a wonderful group of ladies who turned out to cook, laugh, drink wine, and support our local school. Most had not attended a cooking class before, and after we reviewed the recipes and finally got cooking at about 7pm, they were convinced that I was nuts and we were all not going to eat until midnight! But everyone got right down to business, and we were sitting down to a wonderful dinner a few minutes after 9.

On our last Italiaoutdoors culinary bike trips in Italy, our hosts at one of the villas we stayed at ran a cooking class and showed us how they make gnocchi. It’s easy, fun, and most people haven’t tried to make it themselves. Last night we made 4 gnocchi dishes, two with the traditional potato gnocchi, one with a butternut squash gnocchi, and the last with a bread gnocchi. I’m posting one of the two potato gnocchi recipes here. I’ll address in later posts the non-traditional ones.

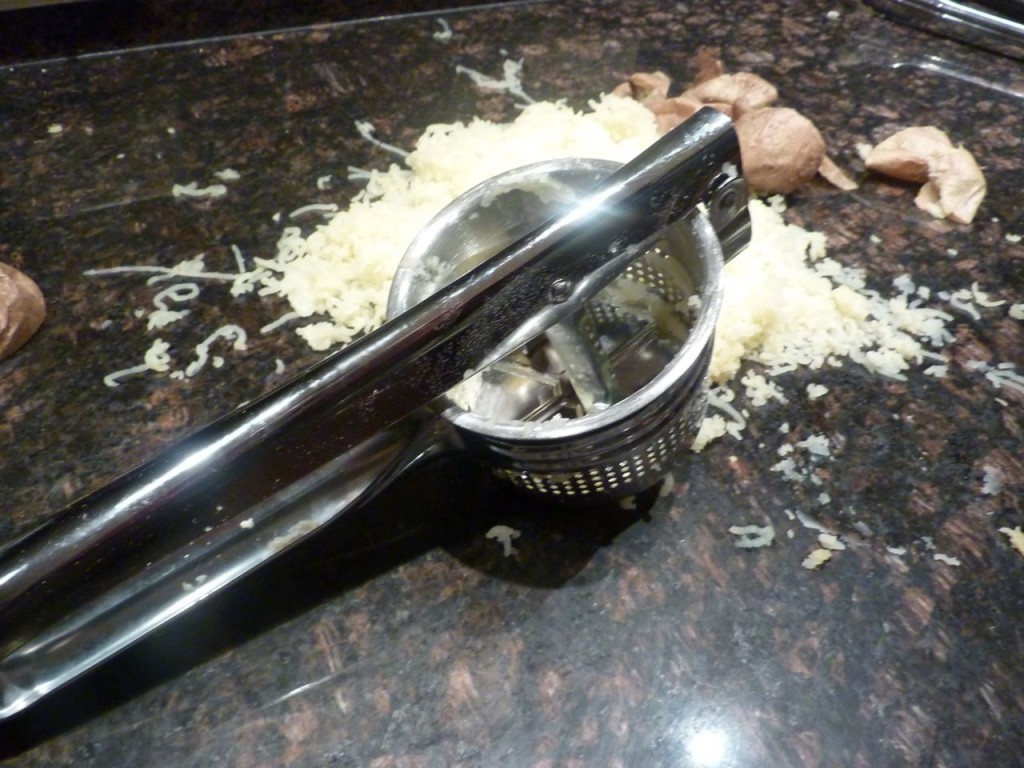
riced potatoes bike wine tours italy

Gnocchi are basically poached dumplings, a dish made for years as a way of using up leftovers be they potatoes, squash, pumpkin, ricotta, or bread. There are couple of tips to making good gnocchi – gnocchi that are tender and light, not heavy and dense.

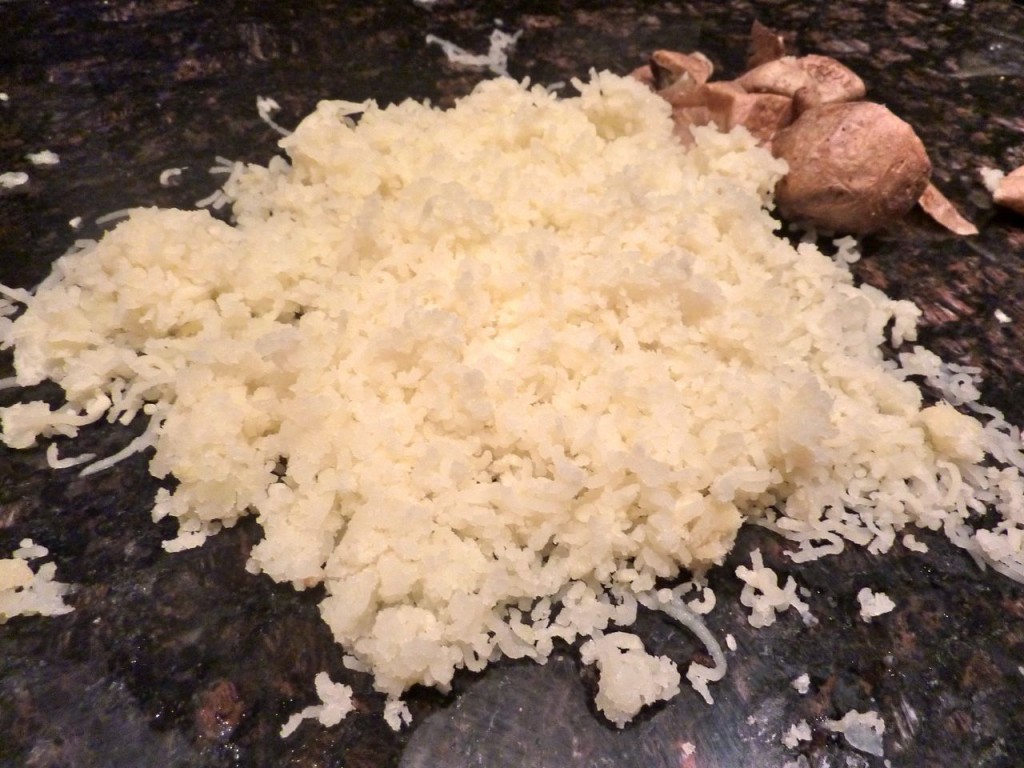
You begin by cooking the potatoes. It doesn’t really matter whether you boil or bake them, I’ve seen recipes that do both. But, regardless of the cooking technique, it is important to rice them when they are warm as they otherwise they can become gummy. “Ricing” potatoes is the act of passing them through a potato ricer, which is basically a sieve with a handle attached that pushes the food through the holes. If you don’t have a ricer, you can use the medium holes on a box grater, or I have even pushed it through strainer with a large spoon.

cooling luxury villas tuscany italy
Riced potatoes cooling

Second, allow the potatoes to cool before continuing. When warm, they continue to sweat a bit and you end up adding more flour to absorb this liquid. Which brings us to the third tip – use as little flour as possible in the production of the gnocchi. The less flour you use, the lighter they will be. I start with a little less than the recipe calls for and then add a bit at a time.

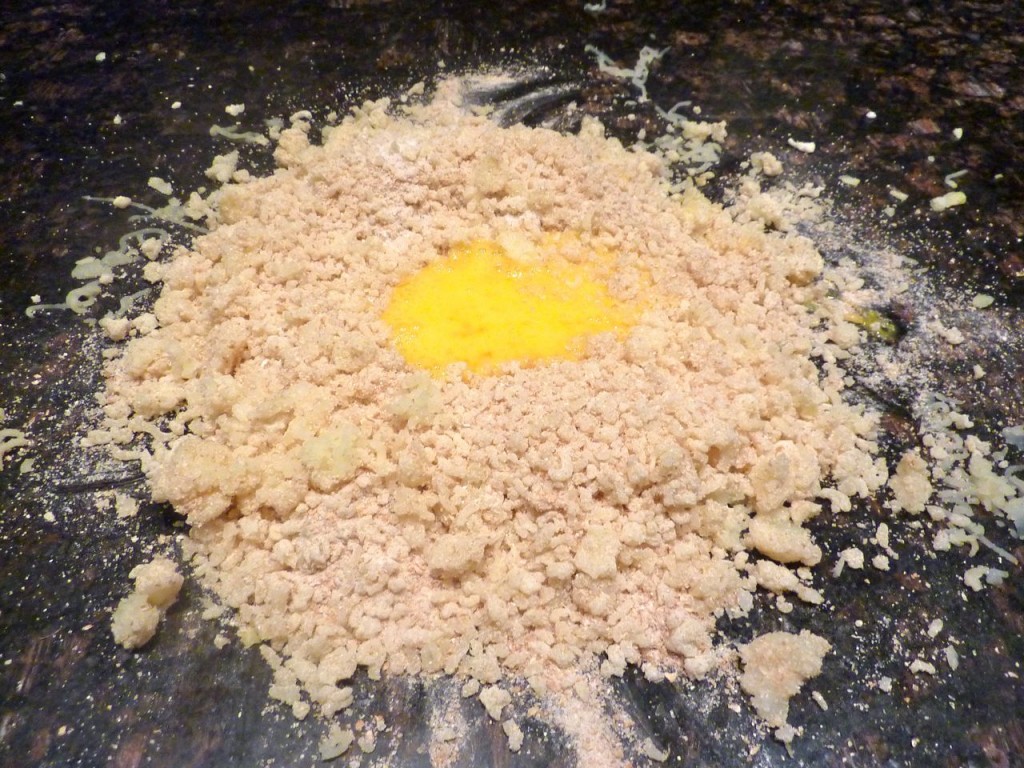
potatoes and egg ski holidays dolomites

I rice the potatoes directly on a counter, then add the flour and salt and lightly mix everything together without compressing the riced potatoes. I then make a well in the center of the potato flour mixture and add the egg, and mix together very quickly. Once the dry ingredients hit the wet, you want to handle the dough as little as possible to get tender gnocchi (tip 4.) If you have not made much gnocchi before, you may want to make and cook a test one at this point to make sure that you have added enough flour to bind it together. Boil some water in a small pan, and drop in a grape-piece of dough. It will first sink, then eventually rise to the surface. If it breaks apart into several pieces, you will need to add more flour.

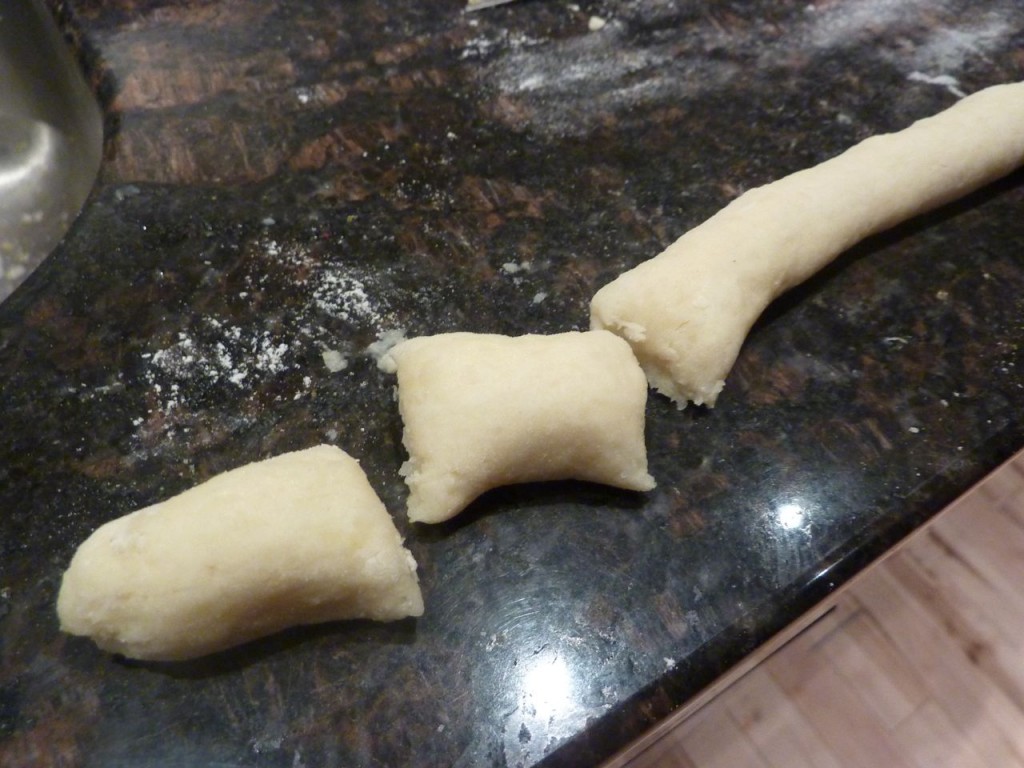
forming gnocchi custom bike tours italy

Once you have the gnocchi dough with the correct amount of flour, you will divide the dough into 6 pieces, and, taking one piece at a time and using the palms of the your hands, roll it out into a long thin log. The log should be the width of your thumb. Using a table knife, cut the log into 1 inch long pieces, and place the individual gnocchi on a floured sheet pan.

gnocchi gourmet bike tours italy
Gnocchi ready to cook

If you are not going to cook the gnocchi in the next day or so, you can freeze them at this point. Place the sheet pan with the gnocchi in the freezer. Once they are frozen, you can store them in a plastic bag. When ready to use them, do not thaw. Just cook the frozen gnocchi as below.

cooking gnocchi bicycle and cooking tours italy
Kathy, Pam and Janet cook gnocchi

Bring a large pot of water to boil, and season with salt. Working in batches, drop about 1/4 or so of the gnocchi into the boiling water. Remove once they float to the surface and place on a clean sheet pan. They are now ready to be added to your favorite sauce, or included in a baked dish as I’ve done here, a cream and tomato gratin.


Potato Gnocchi

This recipe is based on Jody Adams gnocchi recipe from her book “In the Hands of A Chef”.

Make 4 side dish serving (about 65-75 gnocchi)

2 lbs. baking potatoes, cleaned
1 cup all-purpose flour, plus additional for dusting
1 tablespoon kosher salt
1 large egg, beaten

Roast the potatoes for 40-50 minutes, or until done. Make sure they are quite tender, as they will not rice properly if they are still somewhat hard.

Let the potatoes cool for a few minutes. As soon as you can handle them cut each potato in half, scoop out the flesh and place it in a ricer. Rice directly onto the counter. Allow the potatoes to cool.

Add the flour and the salt and mix well. Add the egg, and quickly knead everything together into a sticky dough, working as quickly as possible. The secret to tender, light gnocchi is 1) add as little flour as possible and 2) knead as little as possible.

Fill a small pan with water and bring to a boil. You will use this to test the texture of your gnocchi. Take a small piece of dough, about the size of a grape, and drop it into the boiling water. It will cook for about a minute, and then should rise to the surface. Let it cook for one more minute, then remove it from the water. If, rather than sink and then rise, it breaks apart, add a bit more flour to the dough and knead again. Once you get a test one that sinks and then rises without blowing apart, you are ready to move on to the next step. You should have a test gnocchi that is cooked through, but still soft and light.

Dust the counter with flour. Divide the dough into 6 equally sized pieces. Take one of the pieces and place it on the floured counter top. Using the palms of your hands, roll the piece out into a 1/2 inch thick log, which will be about 12 inches long. Cut the log into 1-inch lengths, and place the individual gnocchi onto a sheet pan that has been dusted with flour. Repeat with the remaining pieces of dough.

Fill a large pot with water, bring to a boil and season with salt. Add the gnocchi to the boiling water in small batches. Once they have risen to the top, allow them to cook for one more minute, then scoop them out with a slotted spoon and lay them on a baking sheet to cool. At this point, they are ready to use in your favorite sauce or baked gnocchi dish.

Baked Cream and Tomato Gnocchi Gratin

This recipe is a basic gratin type recipe that here is used for gnocchi, but can be used with pretty much any pasta. Just precook the pasta and use instead of  the cooked gnocchi.

Make 4 side dish servings

1 tablespoon unsalted butter
1 recipe potato gnocchi (about 65-75 gnocchi) or 3/4 lb. cooked pasta
1 cup light cream
1 16 oz. can diced tomatoes
Kosher salt and freshly ground pepper
3/4 cup freshly grated parmigiano reggiano or grana cheese
1/2 cup panko or other bread crumbs
2 tablespoons fresh basil, thinly sliced

Preheat the broiler.

Grease a shallow baking dish with the butter. The baking dish needs to be large enough to accommodate the gnocchi or pasta in a single layer.

Heat the cream in a small saucepan over medium heat. When it just starts to simmer, season with salt and pepper and add the tomatoes and remove from the heat.

Arrange the gnocchi or pasta in the baking dish. Pour the cream mixture over the gnocchi or pasta. Sprinkle with the cheese and bread crumbs. Place under the broiler until the gnocchi or pasta are toasted, about 5 minutes.

Top with the basil and serve.

Posted in Uncategorized | Tagged , , , , , , , , , , , , , | 3 Comments

The Best Leftover Turkey Soup or How to Use Your Entire Turkey

turkey soup bike tours italy
The Best Turkey Soup

This year I purchased a 25 pound organic turkey from my local farm stand for our Thanksgiving feast. As always, my objective is to utilize the ENTIRE bird. This is a very European sentiment that we see all across Italy as we tour on our bikes. The local cured pork products, the cuisine that uses many different cuts of meat, all born out of the necessity of using every single part of the animal. Here’s some ideas about how to put the entire turkey to use in your kitchen.

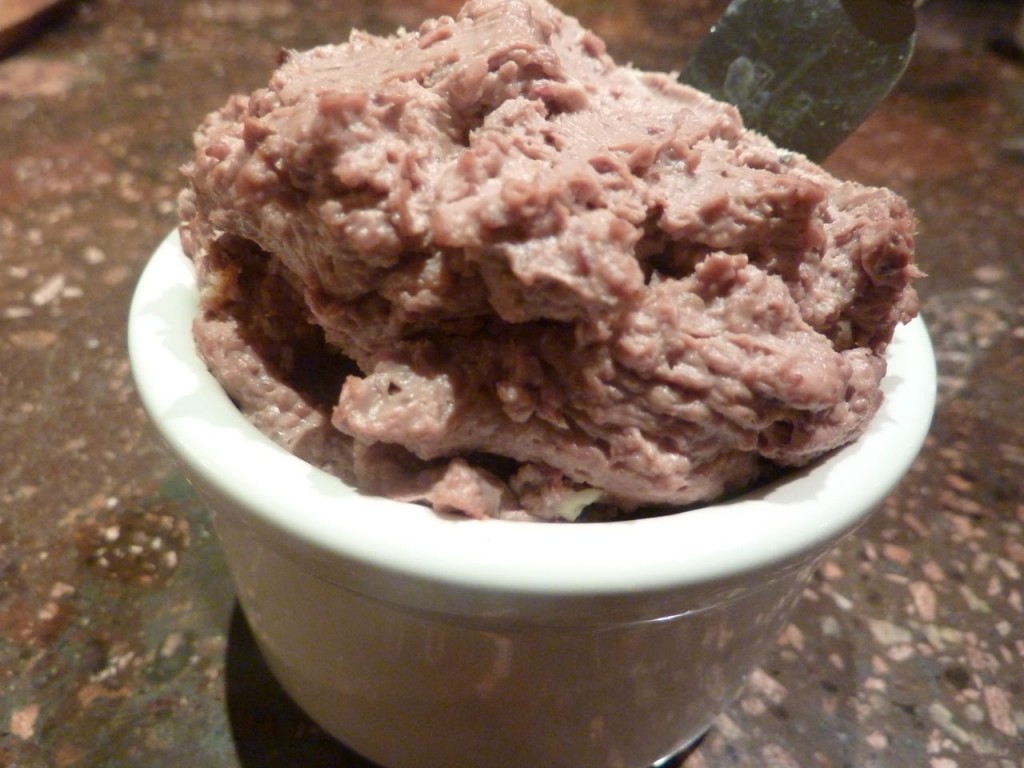
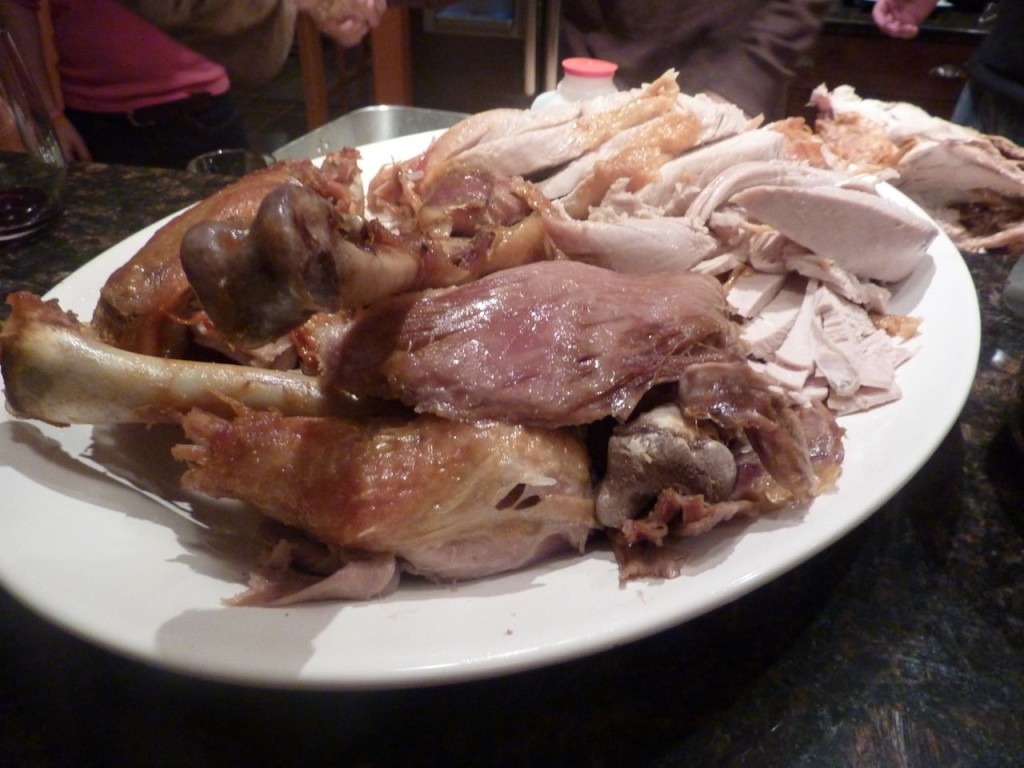
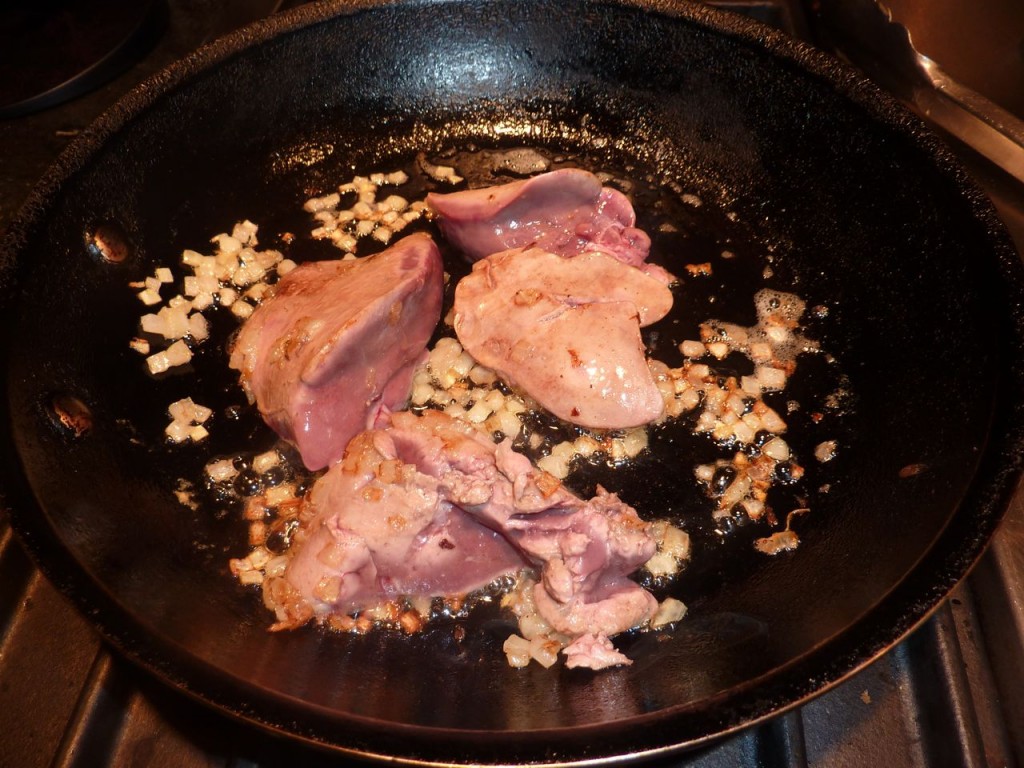
Upon getting the turkey home, I removed the neck, heart, gizzard and livers. The neck, heart and gizzard go into my stock, either immediately or into the bag I keep in my freezer for use in my next batch (see my post last week on Crock Pot Stock.) I don’t use the liver in stock – it makes it cloudy – but I whip up a quick liver pate which I use as an appetizer on Thanksgiving. The recipe for this is pretty basic, and included below.

turkey live pate culinary bike tours italy
Turkey Liver Pate

On Thanksgiving itself, we cook the bird. We always brine regardless of whether we roast, smoke, or deep fry. It is the best way of insuring a moist turkey, and can be a great way to add flavor if you spike your brine with herbs, brown sugar, maple syrup, even tea – many options here! My friend Steve Dunn, OuiChef, is waiting for my description on the deep fry process, so here it goes:

Invite a bunch of friends over for Thanksgiving dinner. Deep frying is of course done outside, and only takes 3-4 minutes per pound. So our guests have arrived before we’ve even started cooking the bird. It has been removed from the brine an hour or so before cooking and is hanging in our garage to air-dry. You don’t want to lower a wet bird into a pot of bubbling oil.

deep fried turkey cycling dolomites italiaoutdoors food and wine
Deep Fried Turkey

At this point, the prosecco has been opened and I am finishing off the 8 sides dishes I’ve planned, chatting with the girls, and catching up with the crowd of teenagers that have just shown up and will now be joining us for dinner. So all I can say is that the turkey disappears into the back yard with the men and beer and comes back an hour and a half later ready to go. I’ll have to devote another post (and another turkey) to the process to do it any justice.

The carcass and any other random spare parts go into a couple of plastic bags that I store in the freezer, destined for turkey stock.

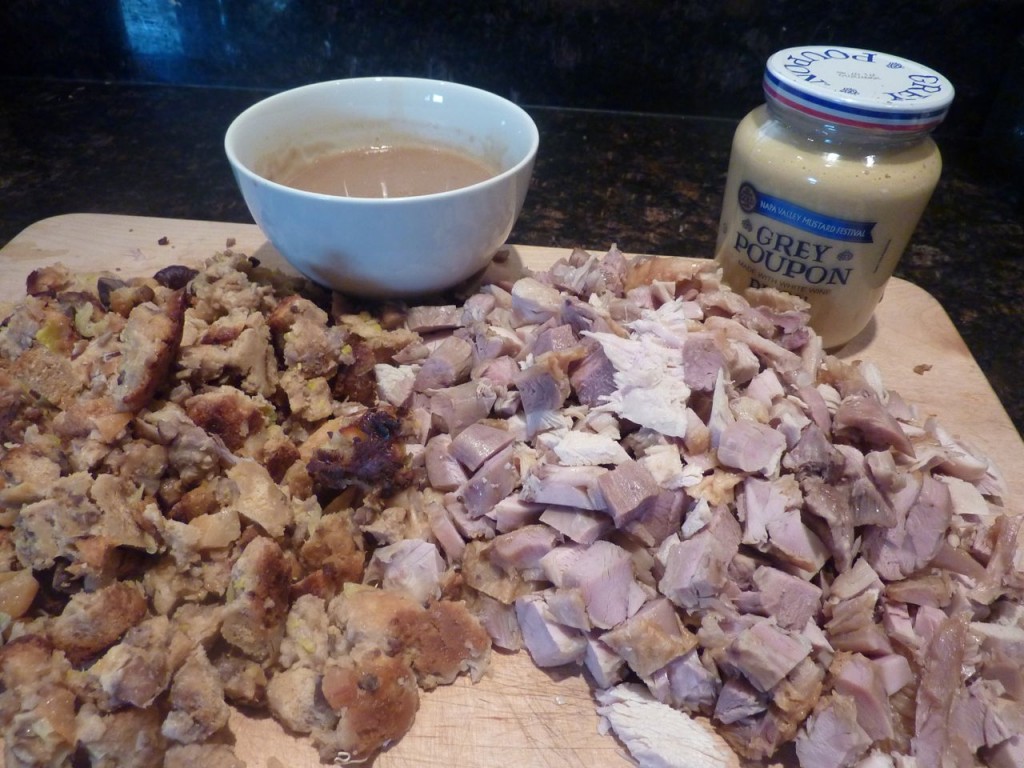
In spite of our best efforts on Thanksgiving and a lunch of turkey sandwiches the following day, we still have leftover turkey meat to deal with. Or we did, until I put the last of the turkey to good use in a great, hearty soup. The recipe here is meant to be flexible and use what you have. Leftover turkey, stuffing and gravy all go in, the proportions are really not that important. Have a lot of roasted vegetables leftover? Throw them in too. This is one of my favorite soups and I wish I could figure out how to have it more often without having to cook an entire turkey dinner to get it. It was a great lunch on Saturday, after my first ski day of the year.

ingredients for soup ski holidays dolomites italiaoutdoors food and wine
Stuffing, turkey meat, gravy and mustard

A nice change this year was the addition of the dijon mustard. I found a recipe in the “Silver Spoon” Italian cookbook for a turkey stew with mustard which provided a nice little zing to the soup, and a new flavor element to counteract turkey fatigue. It is common in both Italy and France to serve dijon mustard along with turkey.

Turkey Liver Pate

Makes about 1/2 cup of pate (depending upon the size and number of livers)

1 tablespoon butter
1 tablespoon minced shallot
1 turkey liver, rinsed and cleaned (remove the lighter, stringy fibers)
A chunk of butter, about 3/4 the size of the liver, softened
A few fresh thyme sprigs
A splash of your favorite liquor – grappa, cognac, bourbon
kosher salt and freshly ground pepper

Melt the butter in a small saucepan. Add the minced shallots and saute until softened, about 3 minutes. Add the turkey liver and saute until cooked through. Remove from heat.

saute liver custom bike tours italy italiaoutdoors food and wine
Sauteing livers

Place the contents of the saucepan in a food processor. Add the butter, thyme and liquor and pulse until combined. Season with salt, pepper, and a bit more liquor if desired. Place in a small ramekin, and serve with crackers as a Thanksgiving appetizer.

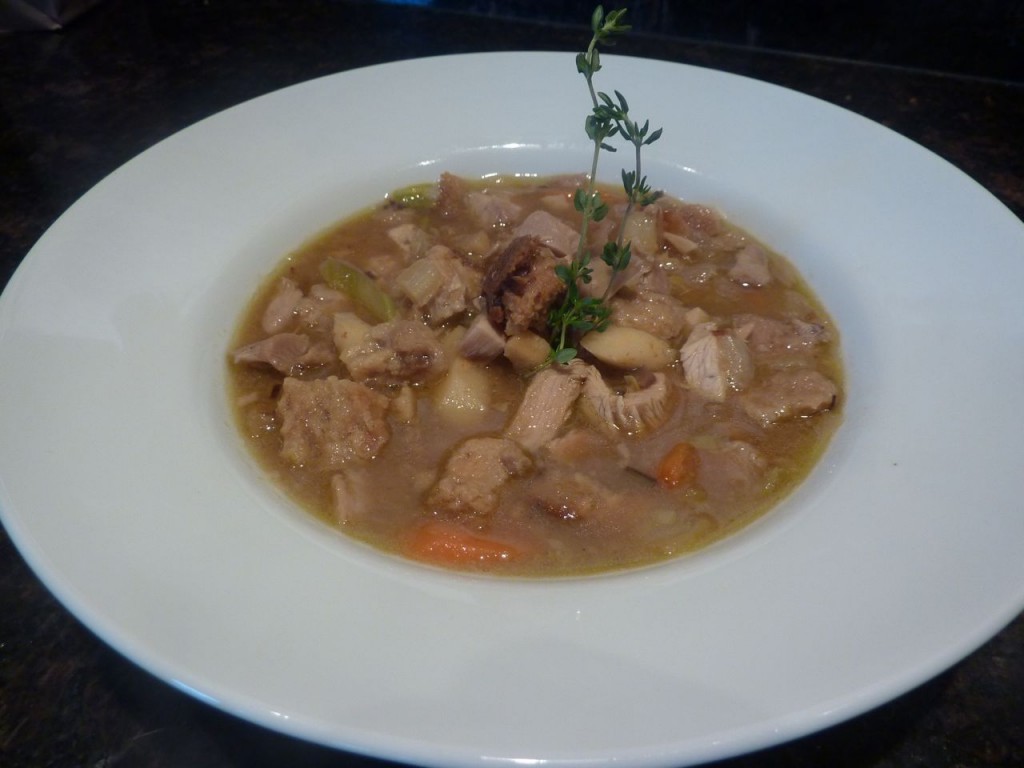
The Best Leftover Turkey Soup

In culinary school, we learned the formal definitions of the various types of soups. One specific type is a panade, which incorporates bread crumbs as a thickening agent. This term is also used to refer to the use of bread crumbs as a binding agent in general, for anything from quenelles to meatballs. The well-known soup from Tuscany, Pappa al Pomodoro, is an example of a panade.

soup ingredients private cycling holidays europe italiaoutdoors food and wine
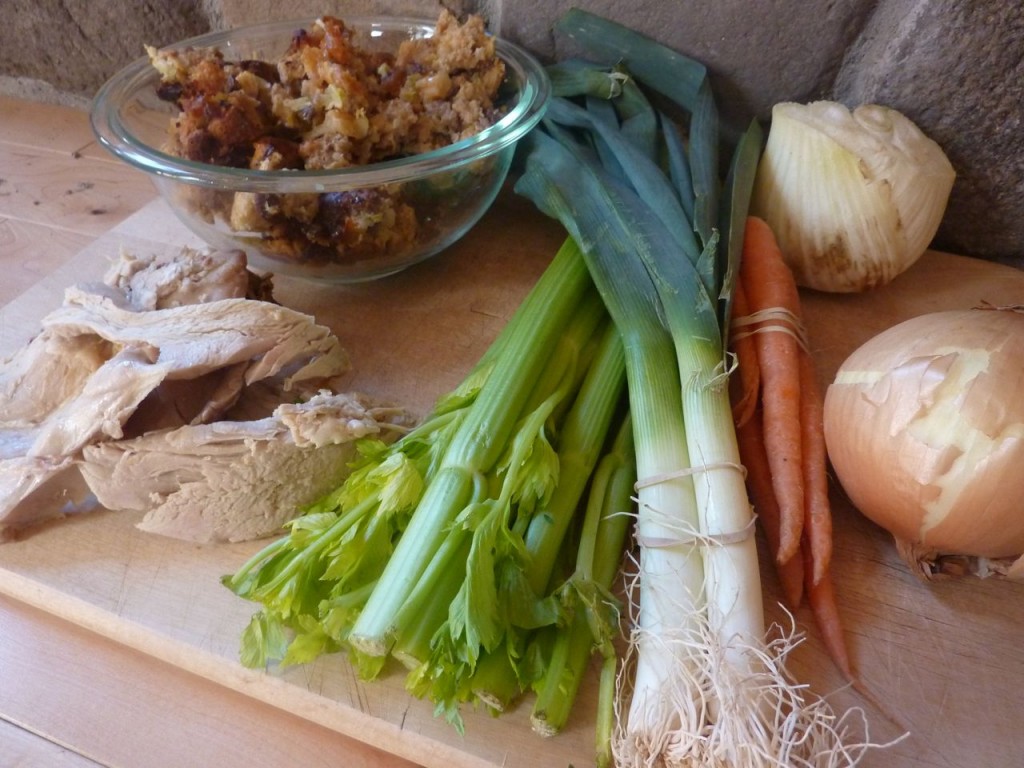
Ingredients for soup

With a refrigerator full of Thanksgiving leftovers, what better way to put all of them to use than to combine them in a soup. A few years ago I threw in the stuffing as well, and I’ve been making this ‘panade’ soup every year since. Even my kids enjoy it, all the while they are insisting they are tired of turkey!

Serves 6

2 tablespoons extra virgin olive oil
2 stalks celery, peeled and sliced
2 carrots, peeled and sliced
1 onion, chopped into 1/4 inch dice
1 leek, white part only, cut in half lengthwise and thinly sliced, rinsed in a large bowl to remove grit
1 bulb fennel, tough outer parts removed, chopped into 1/4 inch dice
Kosher salt and freshly ground pepper
6 cups turkey stock, bring to a boil before using
2-3 cups turkey meat, coarsely chopped
2-3 cups stuffing
Any leftover roasted vegetables, cut into bite sized pieces
1/2 – 1  cup gravy
1/4 cup dijon mustard

Heat the olive oil in a large stock pot over medium-high heat. Add the celery, carrots, onion, leek and fennel. Saute until softened and beginning to brown, about 5 minutes. Season with salt and pepper.

Add the hot turkey stock, and simmer until the vegetables are cooked through, about 5 minutes.

Add the turkey meat, stuffing, roasted vegetables, gravy and dijon mustard. Simmer until heated through, adjust seasonings, and serve.

Posted in Soups, Thanksgiving, Turkey, Uncategorized | Tagged , , , , , , , , , , , , , , , | Leave a comment