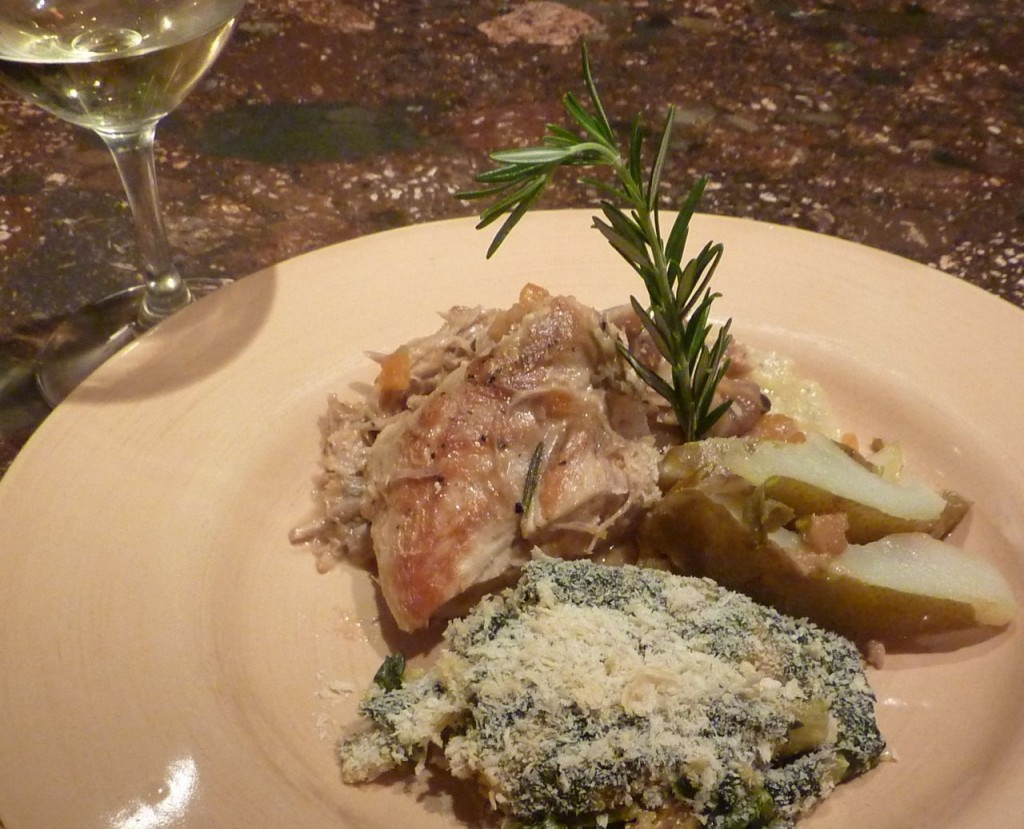
Braised Turkey with Pears, Chestnuts and Rosemary

Braised turkey with pears bike tours italy italiaoutdoors food and wine
Braised Turkey with Pears

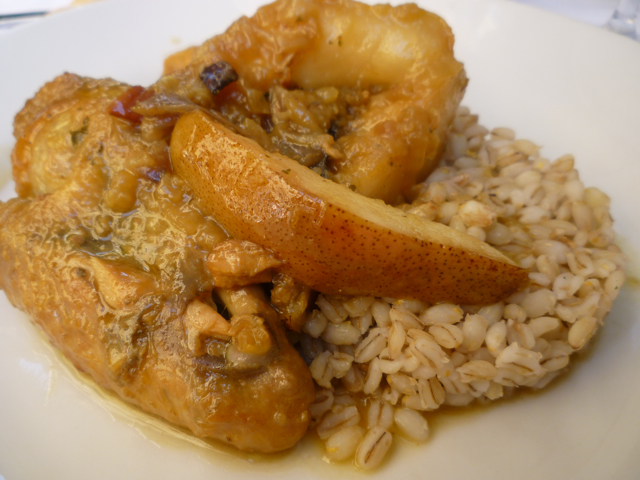
If I had to pick one example of traditional American cuisine, it would probably be a Thanksgiving dinner. Every year, millions search their recipes books, magazines, and the internet looking for a new twist on the classic roast turkey. Or maybe, to be a little different, we might smoke it or deep fry it (we’re into the latter now.) So, how else to prepare a turkey? Once again, I’ve found inspiration in Italy. Turkey is not something one thinks of as “Italian”, but turkeys are part of the cuisine of the Veneto that we see during our Italiaoutdoors Food and Wine tours. We don’t see a large roast turkey, but smaller birds – they raise many different breeds in this region, including pigeon, geese, guinea fowl, and duck –  prepared a variety of ways. Braising is always a favorite fallback of mine, so I developed this recipe for turkey. The flavor combination of poultry and pears was one I enjoyed in Ferrara, Italy.
pigeon and pears bike wine tours
Pigeon and pears in Ferrara, Italy

Probably the hardest part of this recipe for many will be the first step – cutting the turkey into pieces. I begin by removing the legs. You slice right through the web of skin that goes from the leg to the rib cage, and I find by rotating the leg around in a circle, you can pretty much just pop it out of the socket. Cut through right where the thigh bone joins with the hip socket. You should not have to cut directly through a bone. The same technique can be used to separate the thigh from the drumstick – again, just by folding that joint the wrong way you can locate where the two bones meet and cut through fairly easily. The next step is to remove the breast meat from the rib cage. You begin at the breast bone which runs along the length of the breast at the center. Take a knife and make a shallow cut along its length on one side or the other. Continue to deepen this cut in stages, following the rib cage down. Progressing in this manner, you will remove the breast in one piece. As you reach the bottom of the rib cage, you will find the joint where the wing and the rib cage meet, and again, folding the wing away from the breast will let you locate the center of the joint where you will be able to cut through fairly easily. Then just cut the wing away from the breast. You will have 8 pieces at this point; 2 wings, 2 breasts, 2 thighs and 2 drumsticks. Plus a leftover carcass of the rib cage and back. I cut the turkey into pieces early in the day, and made a quick brown stock with the carcass, neck and giblets.
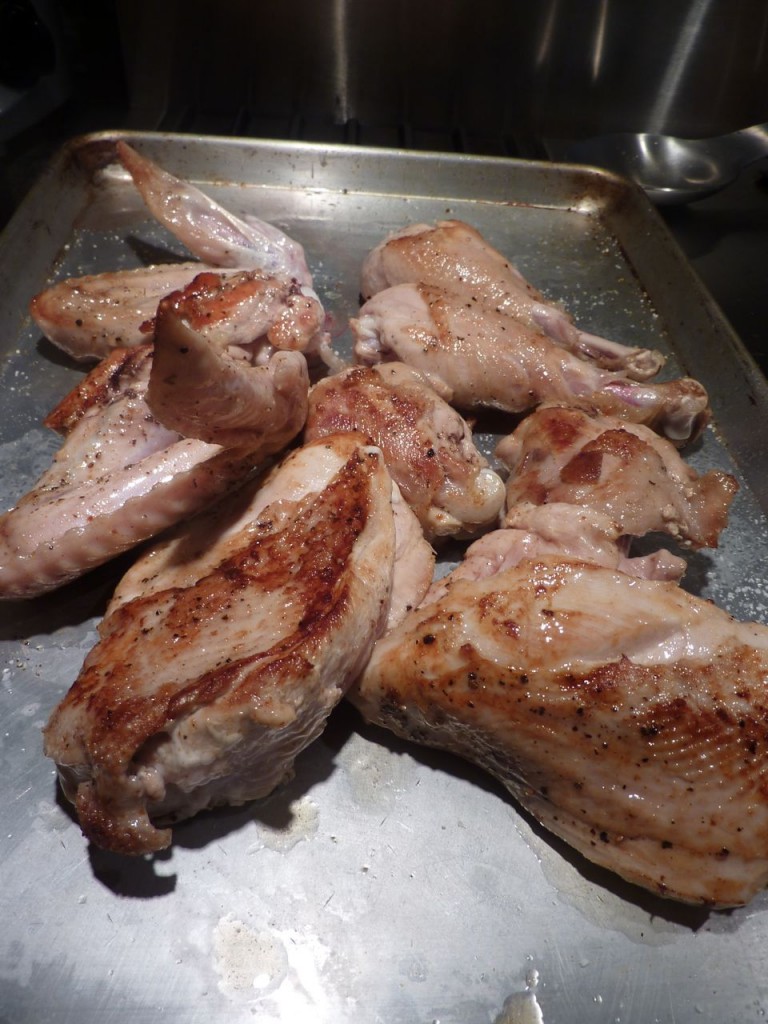
seared turkey cycling tours dolomites italiaoutdoors food and wine
Seared turkey pieces

The braise was pretty standard – sear the meat, cook the standard soffrito (carrots, celery, onions), wine and stock as a braising liquid.  I used dried pears in the actual braise itself, rather than fresh, knowing that the fresh ones would quickly fall apart. I added a garnish of a roasted fresh pear. I have to say, I prefer the flavor of the braise to a roast turkey, and will be doing this again. I served this with polenta, but it would be great with pasta, or mashed potatoes, or a risotto. Or stuffing!
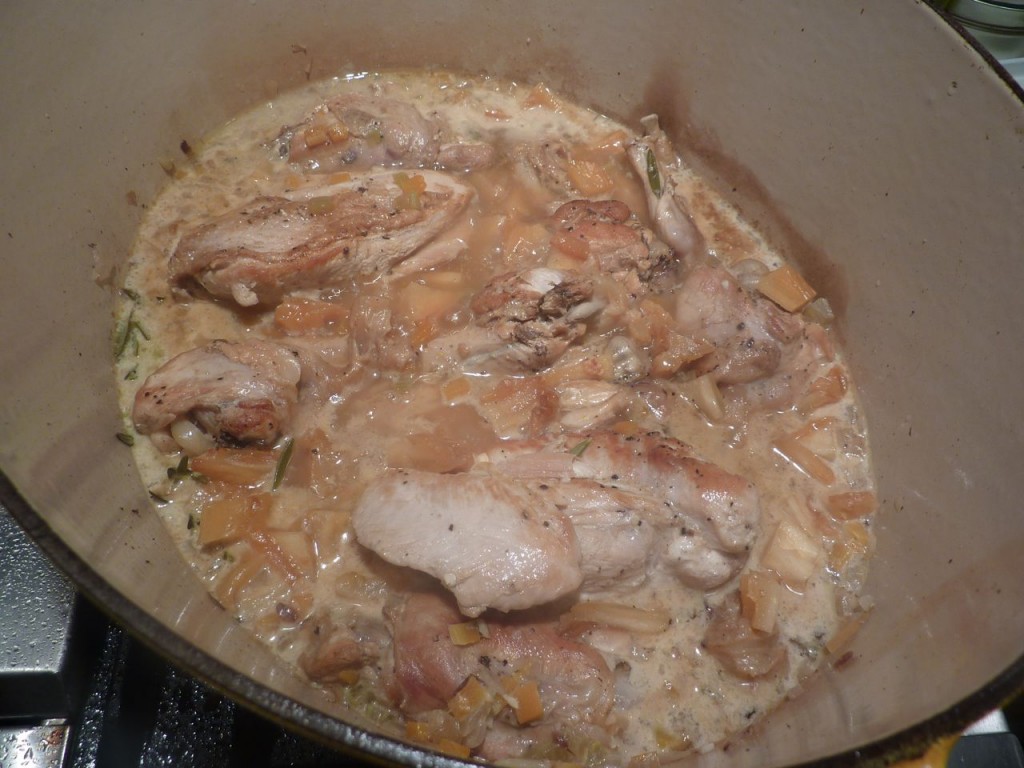
braising turkey ski holidays dolomites italiaoutdoors food and wine
Braising turkey

Braised Turkey with Pears, Chestnuts and Rosemary

Serve 4, with leftovers

1 small turkey (6-8 pounds)
kosher salt and freshly ground pepper
2 tablespoons vegetable oil
2 stalks celery, peeled and cut into 1/4 inch dice
2 carrots, peeled and cut into 1/4 inch dice
1 onion, cut into 1/4 inch dice
1/2 cup white wine
4 cups turkey or chicken stock
1 teaspoon fresh rosemary, finely chopped
1 pear
6 ounces dried pears, cut into 1/2 inch pieces
4 ounces chestnuts, coarsely chopped

Cut the turkey into pieces. First, remove the two legs from the body. Separate the thighs from the drumstick. Then, using a boning knife and starting from the center of the breast bone, separate each breast and wing from the rib cage. Cut the wing away from the breast meat. You should now have 8 pieces: 2 thighs, 2 drumsticks, 2 wings, and 2 boneless breasts. You can do this early in the day, and then make your stock with the rib cage and back.

Season the turkey pieces with salt and pepper. Heat the oil in a large heavy pot. Sear the turkey pieces on all sides. Do this in batches if necessary, as you do not want to crowd them in the pan. They will steam, rather than sear. Remove from heat.

Reduce the heat to medium, and add the celery, carrots, and onions. Season with salt and pepper and cook until softened, about 5 minutes.

Add the wine and bring to a boil. Reduce for a minute or so. Add the turkey thighs, drumsticks and wings. Add just enough stock so that the liquid comes  about 2/3 of the way up the sides of the meat. Add the rosemary. Cover first with parchment, and then with a sheet of foil. Cover with the lid. reduce the heat to low, and simmer slowly for 2 hours, turning the pieces over halfway through.

In the meantime, cut the pear in half and roast in a 350° oven until tender. Remove from oven. When cool enough to handle, remove the core and slice into 12 slices.

After two hours, lift the foil and parchment and add the breasts and the dried pear. Recover with the parchment, foil, and lid, and braise for another 30 minutes.

After the 30 minutes, uncover the turkey and remove all the turkey pieces from the braising liquid, setting them aside on a sheet pan. Turn up the heat under the braising liquid, add the remaining stock, and reduce until you have about 1/2 cup liquid surrounding the pear pieces. While the braising liquid is reducing, remove the meat from the wings, thighs and drumsticks. Cut each breast into two pieces. You will now have four breast pieces, and a pile of shredded dark meat. Save the bones for stock, if you wish.

Once the braising liquid has reduced, add the breast pieces and the shredded turkey meat back into the pan, and heat through. Add the chestnuts. Place one breast piece and some shredded turkey meat on each plate, and top with the braising liquid and 3 slices of roasted fresh pear. Serve with polenta, mashed potatoes, rice, pasta, even stuffing.
Posted in Braising, Fruit, Pears, Thanksgiving, Turkey, Uncategorized | Tagged , , , , , , , , , , , , , , , , , , , | 4 Comments

Easy Crock Pot Stock

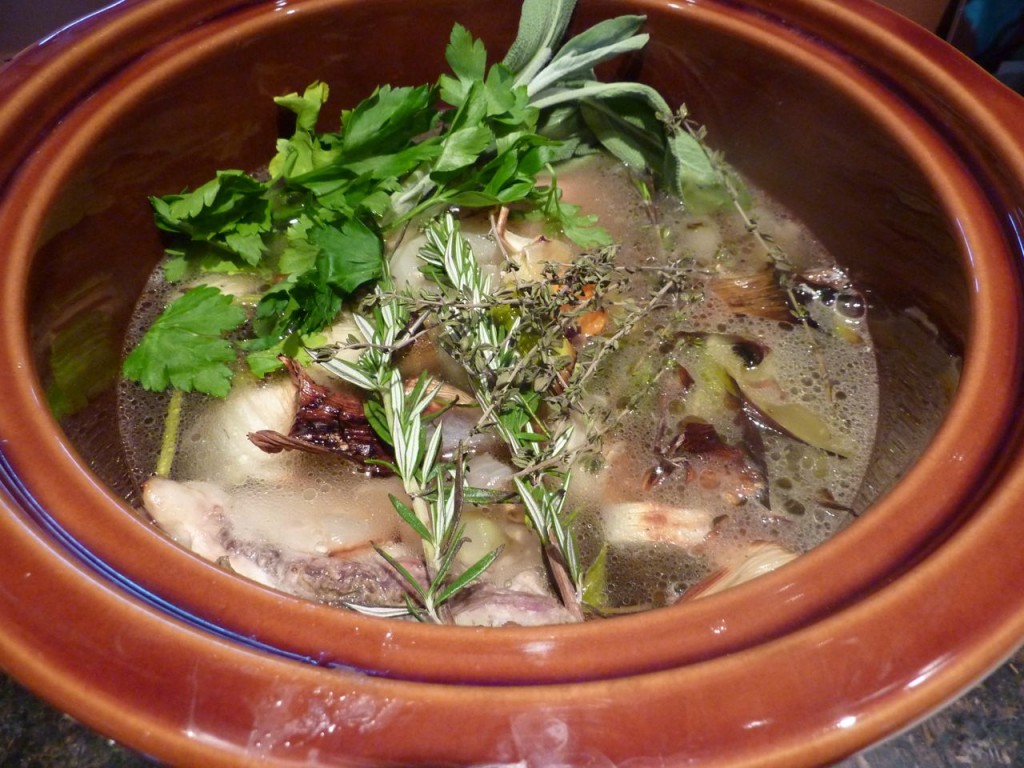
chix stock in crock pot ski holidays dolomites italiaoutdoors food and wine
Stock in crock pot

Not a particularly exciting subject, but I thought it would be worth sharing for the upcoming holiday season. Using your own stock can make a huge difference in your gravies, sauces, warm winter soups and risottos. In our cooking classes in Italy, we make our own stock, even if it only cooks a hour or so. I find even the organic, free range brands from the grocery stores can be lacking in flavor and a bit ‘stale’. With this recipe, a long simmered, highly flavored stock is a snap to make.

To collect the chicken or meat parts for my stocks, I keep a couple of zip lock bags my freezer, one for chicken and one for meat, and as I butterfly chickens or debone meats I collect the scraps in these bags. I use these scraps for my stocks. Although I often need stock before I’ve collected enough scraps (as you’ll notice from the picture); in that case, I’ll use the cheapest chicken parts I can find. Here, I’ve made the stock with whole chicken legs.

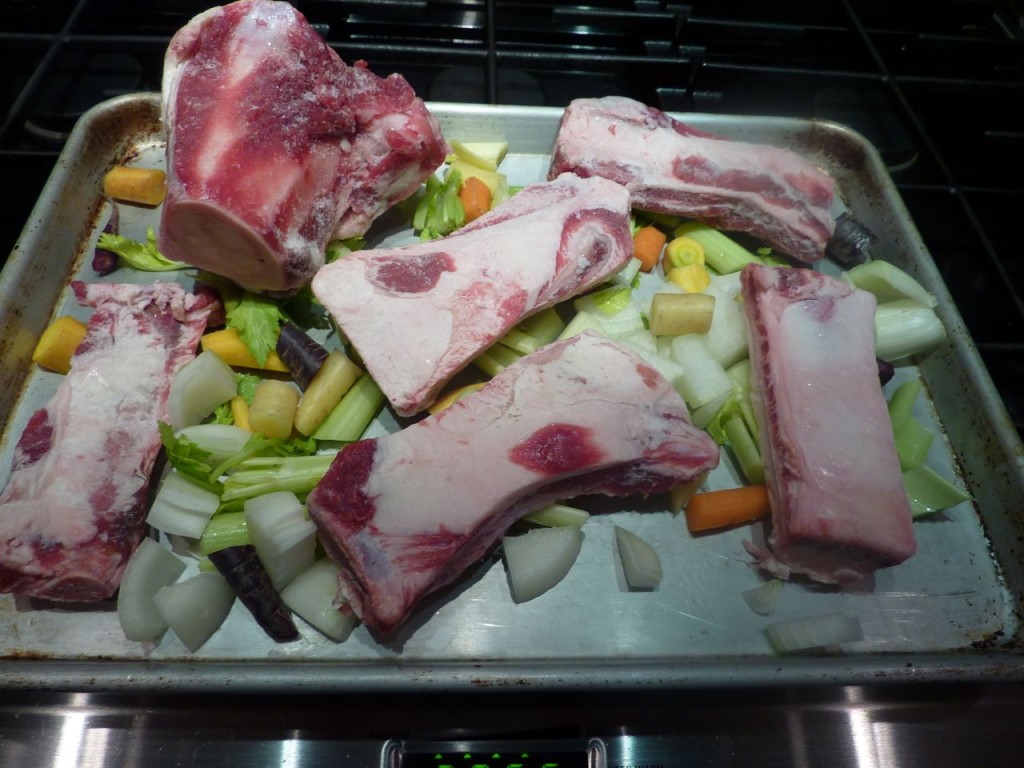
beef for roasting culinary bike tours italy italiaoutdoors food and wine
Beef and vegetables ready to roast

I like brown stocks; the caramelization adds another level of flavor. When I’ve collected enough scraps to fill up my crock pot, I throw the chicken/meat, along with onions, carrots, and celery that have been chopped into a few good sized pieces, and roast briefly in the oven. I know Julia Child frowns on this, she says browning for stock in the oven imparts a bad taste to the meat. However, she uses a lot of scraps like giblets, neck, and hearts. I use backs, even whole thighs, and I have to say I usually think a chicken roasted in the oven tastes pretty good. I don’t find many giblets and hearts in my whole chickens these days. But when I do use them, I don’t roast them in the oven.

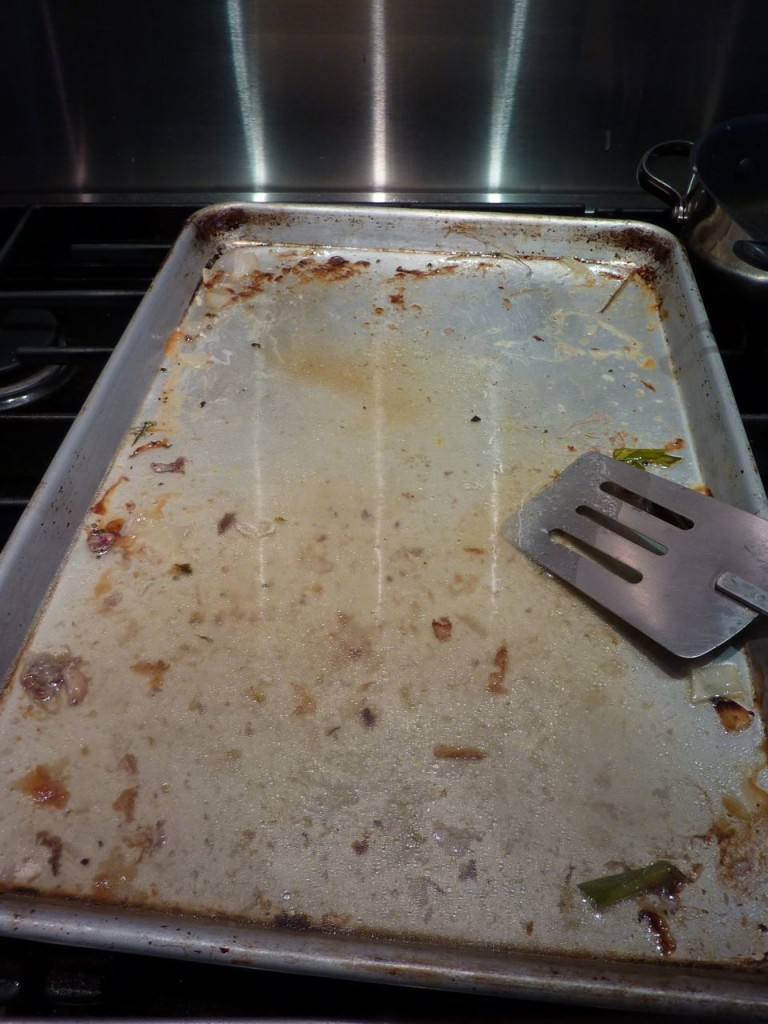
scraping browned bits cycling tours dolomites italiaoutdoors food and wine
Scraping up the browned bits

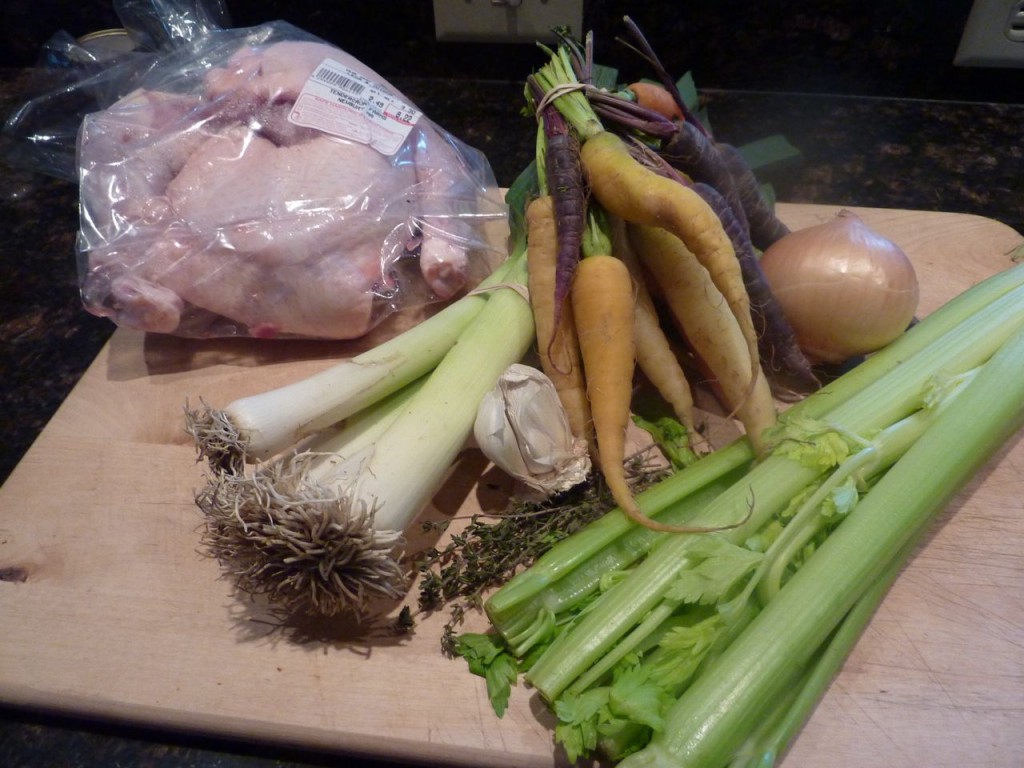
Everything from the oven is then put into a crock pot. I put a little water into the sheet pan I used for the roasting and heat this over the stove while I scrape up those nice browned bits that are left – can’t let those go to waste! I pour this water and browned bits into the crock pot, and then cover with water. My crock pot holds about 12 cups of water, in addition to the meat/vegetables. I then check my refrigerator to see what else interesting I can add; fennel fronds or the top of a leek make a nice addition to a chicken stock. I add the standard stock seasonings: bay leaves, parsley, peppercorns, garlic. I don’t bother with the bouquet garni, wrapping all of these up in a cheese cloth. If they are left whole, they will be removed when you strain everything.

stock ingredients bike tours italy italiaoutdoors food and wine
Stock ingredients

I can then turn on my crock pot and leave everything overnight, or for a full day. I don’t worry about skimming, although I will do it occasionally if I happen to be right there. I leave the cover off if I am around the house, which allows the liquid to reduce a bit and concentrate the flavors. I check the level every once and a while to make sure there is enough. If I am leaving it overnight, or if I plan to be away from home for a while, I will cover it. I can always reduce it later.

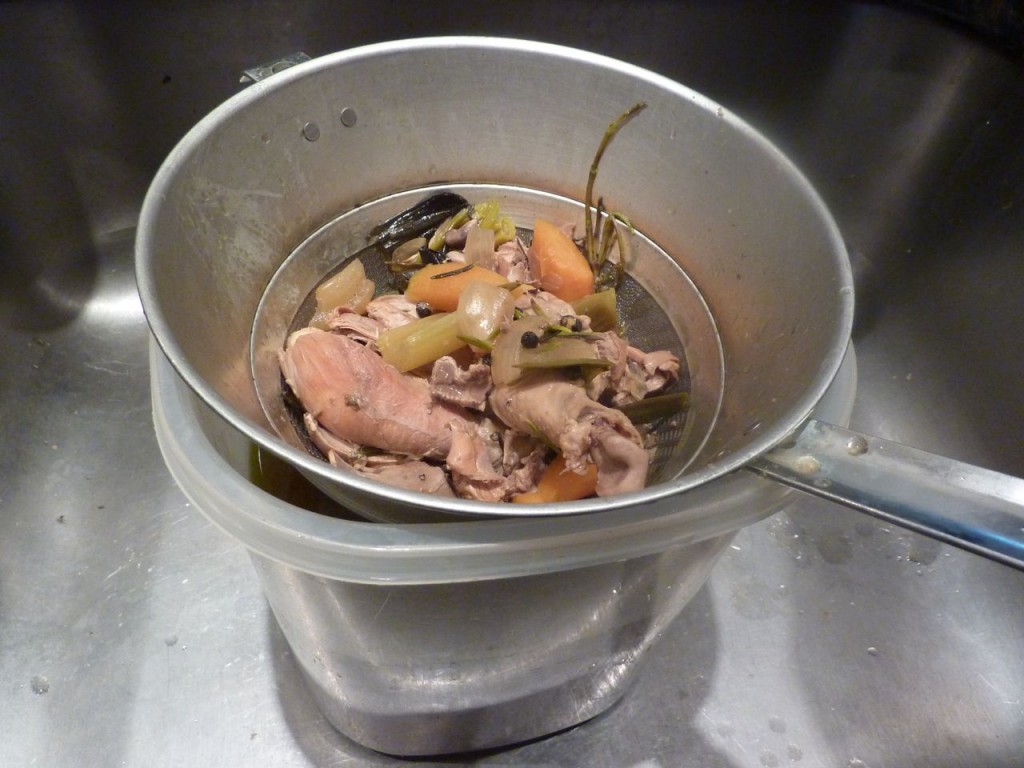
straining the stock bike wine tours italiaoutdoors food and wine
Straining the stock

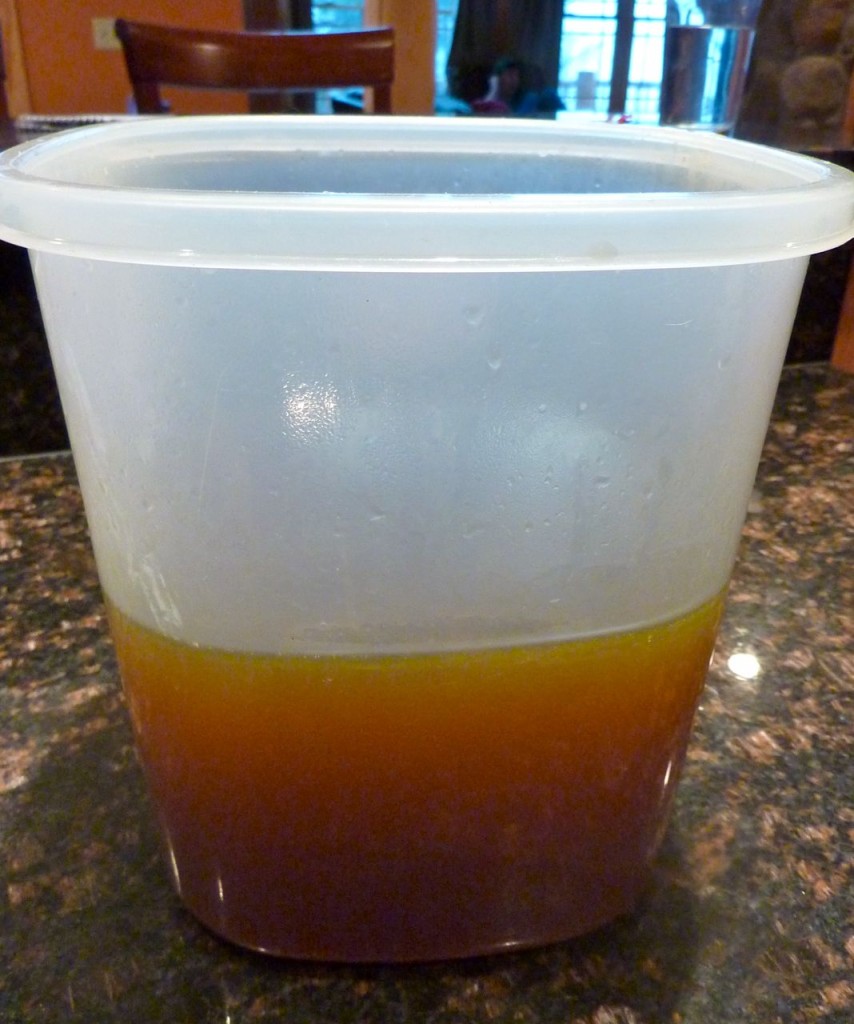
When it has cooked long enough (6-8 hours for chicken, 8-12 for beef), I strain it into a large plastic container. I lift out the larger pieces and dump those directly into the trash, then pour the remainder into a large strainer. I usually chill the stock before I use it, and during the chilling process the fat will rise and solidify on the top. This makes it quite easy to eliminate most of the fat by simply removing and disposing of this layer.

finished stock cycling holidays europe
Finished stock, ready to chill

After chilling, I freeze what I don’t plan on using that week. I either freeze 4 cup batches in a large freezer ziplock, which is a perfect amount for a soup, or I pour the stock into a couple of ice cube trays and freeze stock ‘cubes’. When they are solid, I can remove them from the trays and store them in a single zip lock. These cubes are great for finishing a sauce or in a stir fry.

Crock Pot Stock

Makes approximately 12 cups of stock (depends on the size of your crock pot)

2 lbs. various chicken parts – backs, wings, legs, neck, giblets. Not breasts, livers. For beef stock, bones and scraps.
1/4 cup or so of extra virgin olive oil
2 medium onions, very coarsely chopped
2 stalks celery, cut into larger 1 inch pieces
2 carrots, peeled and cut into large 1 inch pieces
3 bay leaves
4 cloves garlic, peeled
10 springs fresh thyme or 1 tsp. dried
Handful of parsley or parsley stems
10 peppercorns

Preheat the oven to 350°.

Place the larger chicken or meat pieces (not giblets), onion, celery, and carrots on a sheet pan. Drizzle with the olive oil. Roast until brown, about 20-30 minutes. Remove from oven.

Transfer the roasted meat and vegetables into your crock pot. Add the smaller chicken parts and the remaining ingredients to the crock pot.

Place the sheet pan on your stove and pour some water into it, enough to just cover the bottom. Turn on the heat to low, and scrape the browned bits that have adhered to the bottom of the sheet pan to get them to dissolve in the water. This accomplishes two things – it gets those nice browned bits into your stock to add flavor, and it cleans your sheet pan. Pour the water from the sheet pan into your stock pot. Add additional water to cover.

Cover, and bring to a boil. My crock pot has an ‘auto-shift’ setting, which is ‘high’ for the first hour and then switches to ‘low’. This is perfect for stock. You want it to come to a boil, and then reduce to a simmer for 6 hours or so. Meat stock can go even longer.

When the stock is done, strain the stock through a strainer, disposing of the solids. Chill as rapidly as possible. If you have room in your refrigerator, you can place it in an ice water bath.

It will keep in your refrigerator for 3-4 days. It should be brought to a boil before using. If you need to store it longer, it can be frozen.

Posted in Soups, Thanksgiving, Turkey, Uncategorized | Tagged , , , , , , , , , , , , , , , , , | 1 Comment

Apple Amaretti Tart with Almond Ice Cream

apple tart culinary bike tours italy
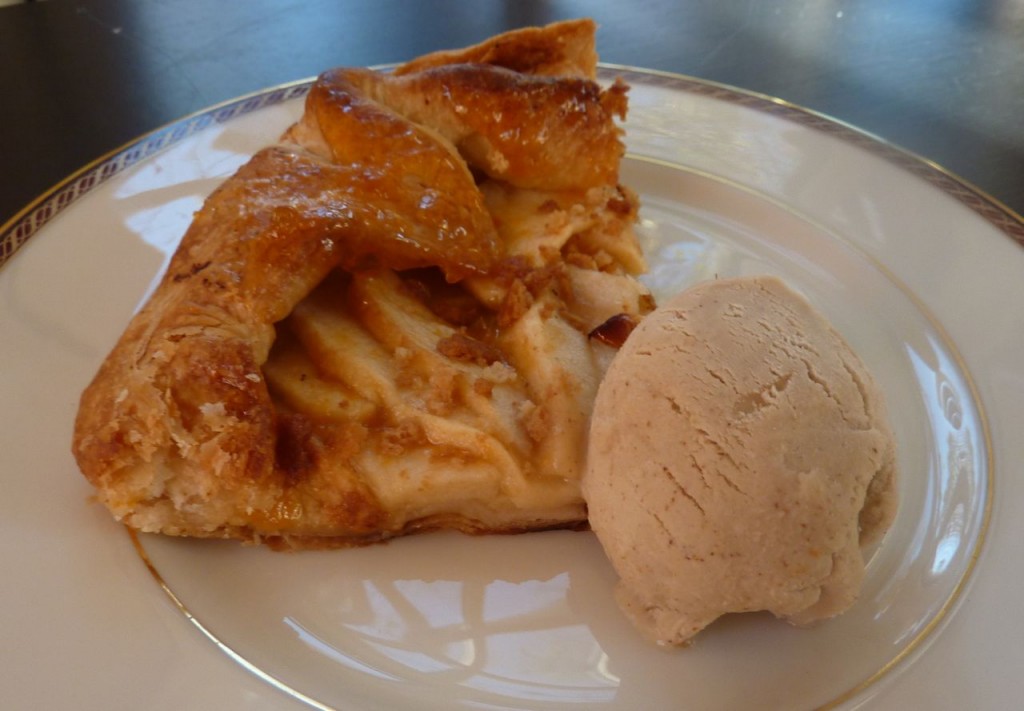
Tart with almond ice cream

On our Italiaoutdoor bike trips this summer to the Veneto, we did a really fun cooking event Villa Margherita with our gracious hosts the Dal Corso family. For dessert, we had a wonderful apple creation in which we cored an apple, filled it with apricot jam and crushed amaretti cookies, then surrounded it with puff pastry. Apples are cultivated in both the Veneto and Trentino regions of Northern Italy, with Trentino being home to the Val di Non DOP, a designation bestowed up apples which are grown according to strict quality and cultivation guidelines.

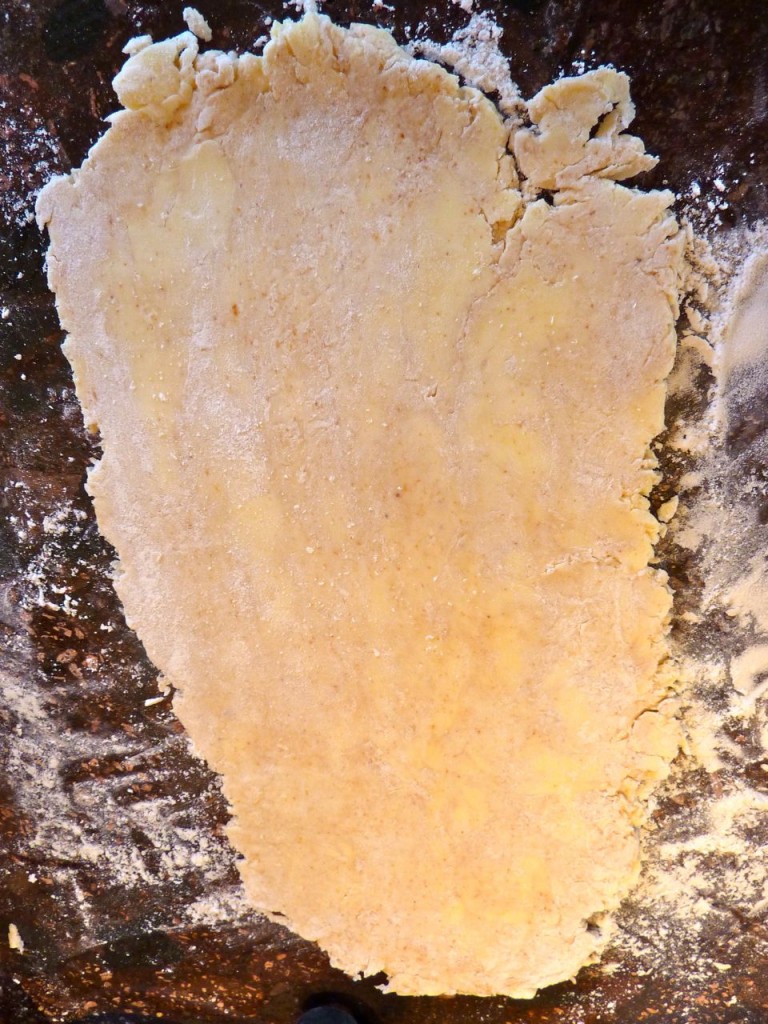
puff pastry cycling tours dolomites
rolled into rectangel

Here, I combined the same flavors in an apple tart. Puff pastry can be a bit laborious to make, but Judy Rodgers offers a simplified version in her book “The Zuni Cafe Cookbook”. It doesn’t “puff” quite as consistently as classic puff pastry, but it is perfect for a rustic tart such as this. I replaced a little flour in the pastry with some finely ground amaretti to bring the almond flavors to the tart crust.

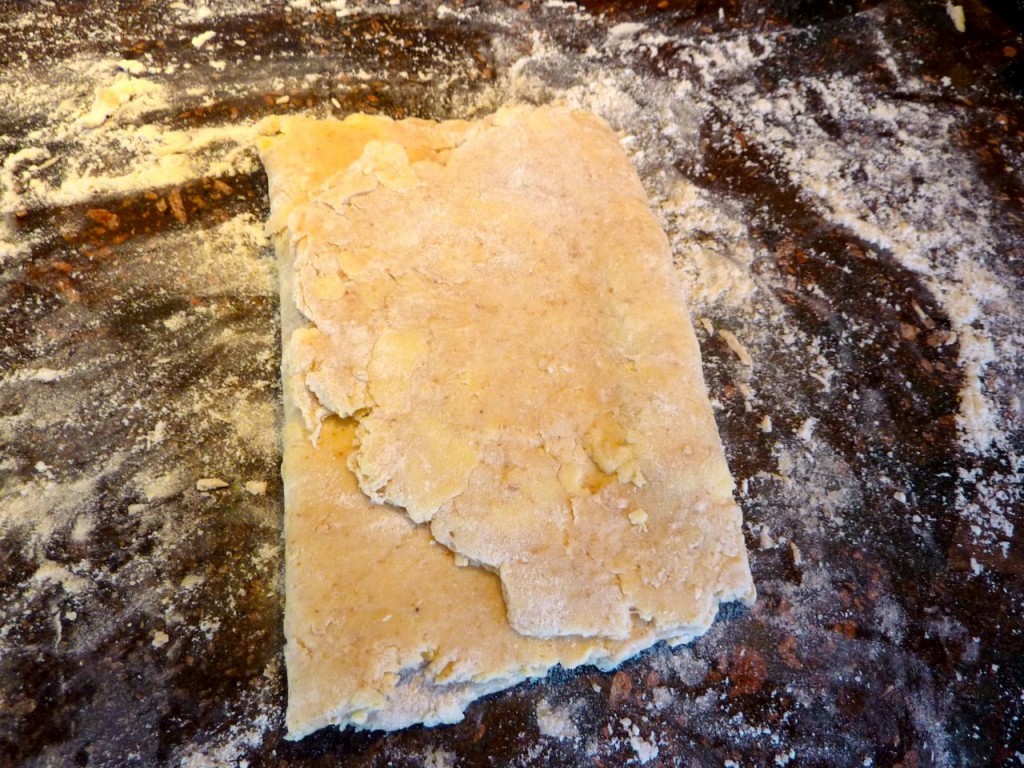
puff pastry custom cycling holidays europe
folded and then turned

Puff pastry has only a few ingredients – butter, flour, water, salt. It gets its “puff” from the process used to make it, which creates hundreds of thin layers of butter/dough. When you bake it, the butter layers melt and leave an air space between the dough layers. To create these layers, you encase a sheet of butter inside an envelope of dough, then roll and fold and roll and fold and chill and roll and…

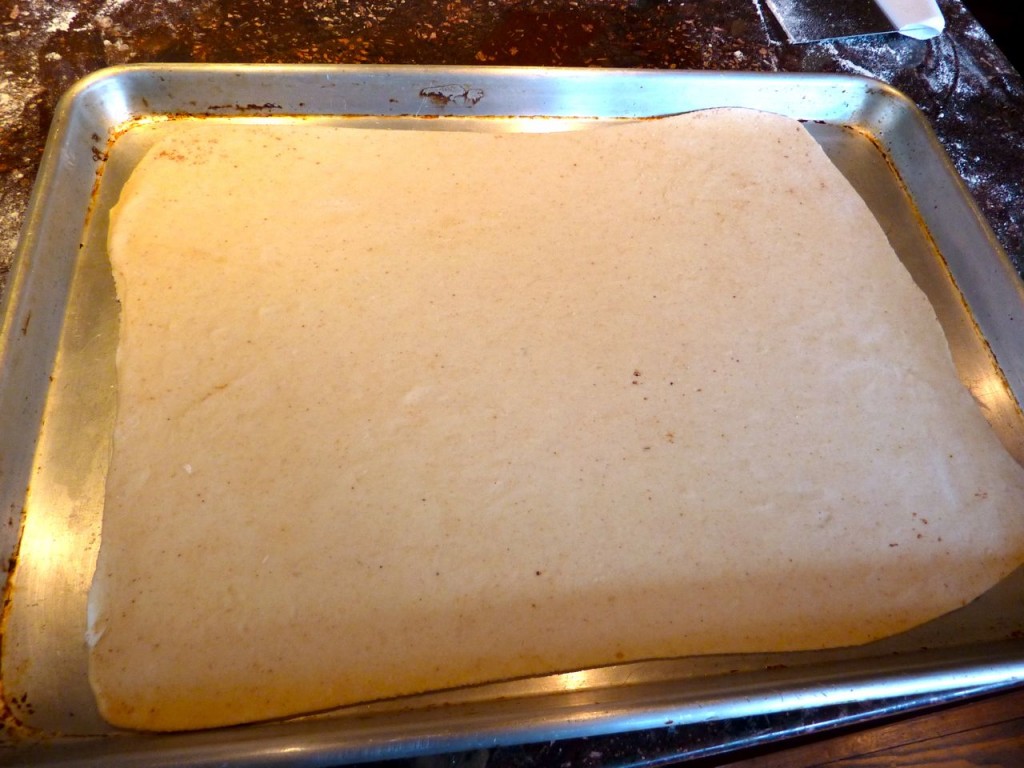
tart dough ski holidays dolomites
rolled out on sheet pan, ready to chill

In Judy Rodger’s version, she slices the butter very thin and incorporates into the flour and water in a method similar to a basic pie crust. To re-create the layers of butter, she keeps the butter in much larger, flatter pieces than you would for a pie crust, and then finishes it off with a series of rolling and folding, just as in the classic puff. The result does not have the uniform layers achieved with the class puff, but it is wonderful for a rustic tart such as this. It is also a very easy recipe to remember – 1 cup flour, 1 stick butter!

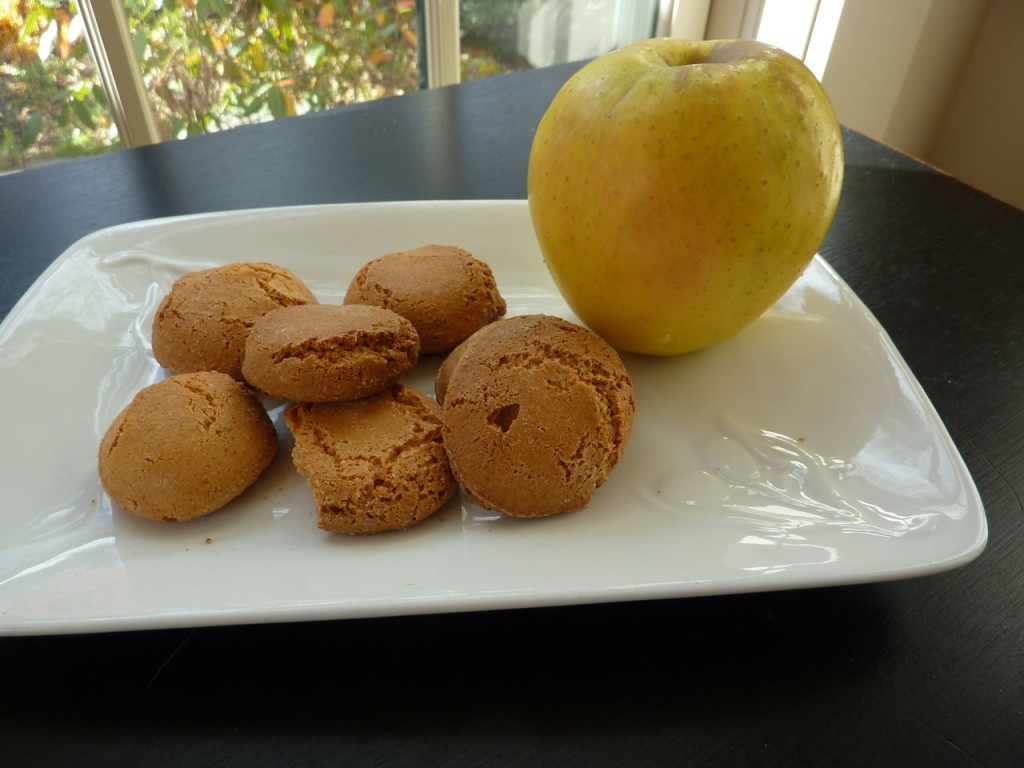
 apple and amaretti luxury villas tuscany

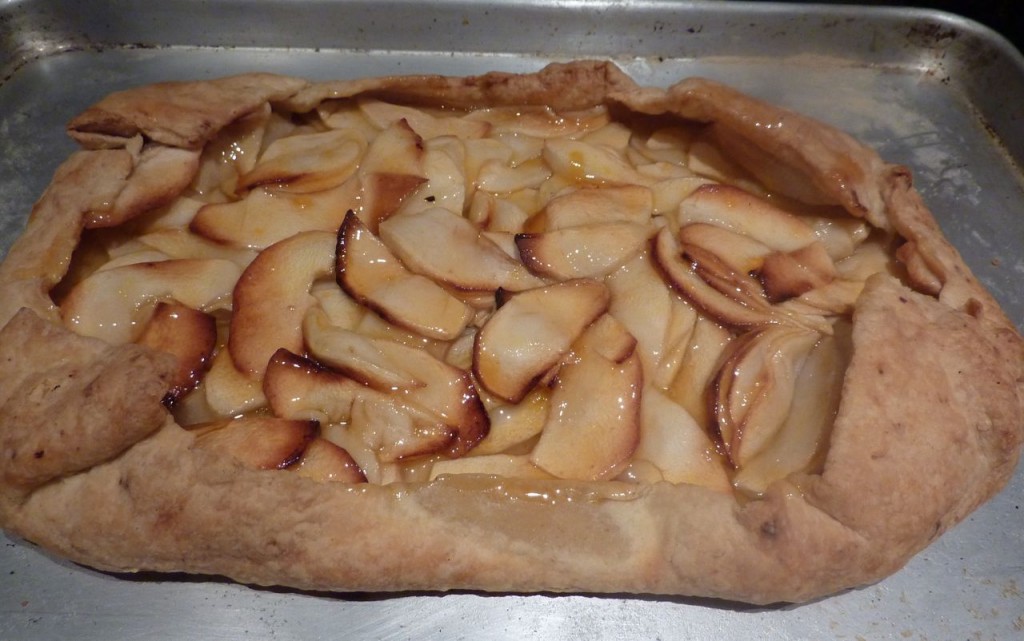
baked tart custom bike tours italy
tart fresh from oven

Apple Amaretti Tart

Serves 8

For amaretti puff pastry:

1 cup minus 1 tablespoon all-purpose flour
1 tablespoon finely crushed amaretti cookies
1 teaspoon salt
8 tablespoons cold unsalted butter (1 stick)
5 to 6 tablespoons of ice water

For the tart:

5 large apples, peeled, cored, and sliced
1 tablespoon butter
1/4 teaspoon salt
1/4 cup apricot jam
2 tablespoons water
1 tablespoon amaretto
12 amaretti cookies

For the puff pastry:

Place the flour, crushed cookies and salt on a counter and mix together.

Cut the butter into 1/4 inch slices. Lay in the flour and coat the butter slices with the flour. Press the slices thin, using your thumb and forefinger. Spread the flour and butter in a circle on the counter and trickle the water over it, one tablespoon at a time, stirring it with your fingers in the butter and flour until it is absorbed. Between each addition of water, use your fingers to lift and move the flour and butter around.

After the water has been added, use a scraper to move the mass together, sliding the scraper under the pile and folding it on top of itself. Then, using the heel of your hand, push down and away on the mass, smearing the mass on the counter. Slide the scraper underneath the mass again, lift and fold on top of itself again. Turn the mass 90°, then using the heel of your hand, push down again on the dough. At this point, all the loose bits of dough should be incorporated, and there should be no dry spots. It will not look smooth or homogeneous in texture. If you still have a fair amount loose bits hanging around, repeat the process of pushing down and away with the dough, then gathering and folding, until it is. Wrap loosely and refrigerate for 30 minutes. If you chill it longer than that, it may need to warm up a bit before it will roll out without cracking.

Measure out a small amount of flour, and dust the counter top and a rolling pin. Roll the dough out, going away from and then toward you, into a rectangle roughly about 18 inches long and 6 inches wide. Fold into thirds (like a letter) from one of the short ends, and then the other. Turn the folded dough 90°, then roll again into the same size rectangle, and repeat the folding process. Rewrap the dough and refrigerate for another 20 minutes.

Repeat this process of rolling, folding, rolling and folding two more times, chilling for 20 minutes in between. After the last set of rolling and folding, refrigerate the dough for at least an hour. At this point, it can be wrapped tightly and kept overnight, or even frozen.

When ready to roll out, make sure the dough is warm enough to roll without cracking. Roll into a square about 8 inches wide and 12 inches long. Place the square on a sheet pan and chill for at least an hour.

For the tart:

Preheat the oven to 375°

Remove from the refrigerator. Fill the center of the tart dough with the apple slices, leaving about 1 inch of dough clear all around the outside of the rectangle. Fold this border up and over the apples, folding the dough together around the corners. Dot the apples with the butter, and sprinkle with a little salt.

Bake until the crust is golden brown and the fruit is tender, about 40 to 45 minutes. Remove from oven.

Mix the apricot jam, water and amaretto in a small saucepan and heat over medium heat until the jam has melted. Simmer until slightly thickened, then remove from heat and brush the glaze on the apple tart. Sprinkle with the crushed amaretti cookies and serve with almond ice cream.

Almond Ice Cream

Serves 8

1/2 cup whole, unblanched almonds
2 cups cream
1 cup milk
2 eggs
3/4 cup sugar

Place the almonds on a baking sheet, and toast until browned. Allow to cool, then finely chop in a food processor.

Combine the cream and milk in a medium saucepan. Bring to a simmer over medium heat. Remove from heat and stir in the chopped almonds. Allow to sit for 2 hours.

In a medium bowl, whisk the eggs for 1-2 minutes. Slowly whisk in the sugar a little at a time. Continue to whisk until lighter and thicker, another minute. Whisk in the almond cream and chill for an hour.

Freeze in an ice cream freezer according to the instructions. Freeze for two hours. Serve with apple amaretti tart, or canned cherries in wine and dark chocolate.

Posted in Apples, Dessert, Ice Cream, Tarts and Pies, Uncategorized | Tagged , , , , , , , , , , , , , , , , , , | 2 Comments

Rack of Lamb with Hazelnut Crust and Cherries

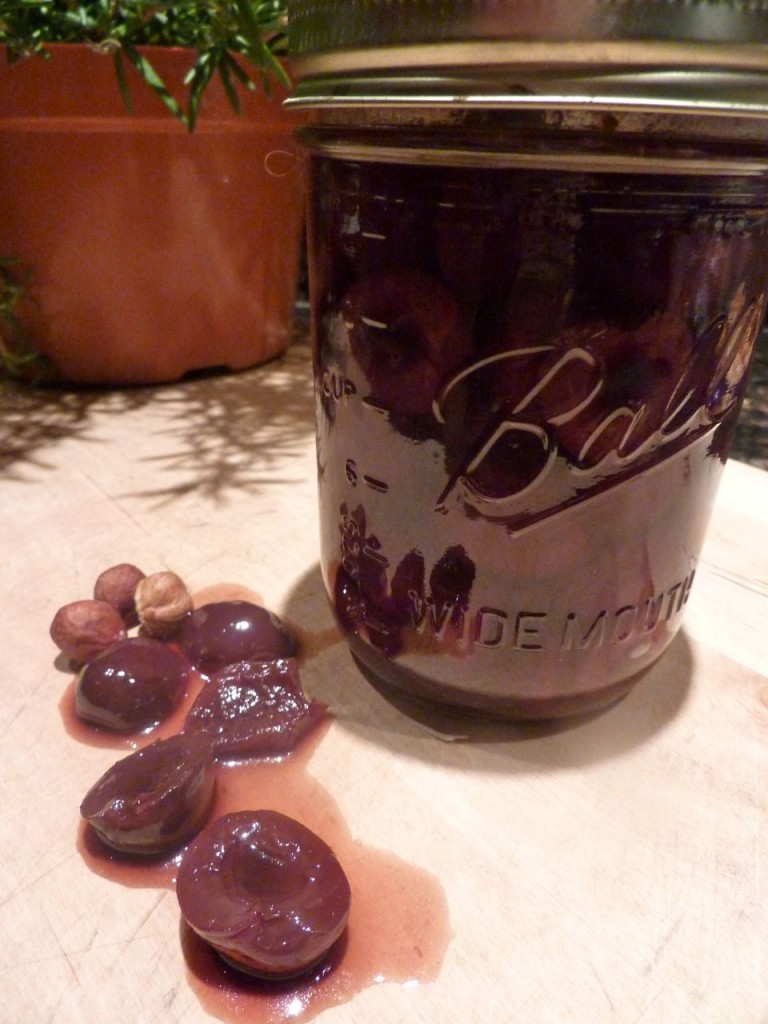
Canned cherries in wine bike tours italy
Canned cherries in wine

Two years ago I began teaching myself the basics of home canning, as part of my continuing effort to eat as ‘locally’ as possible. My freezer was filling up quickly with frozen fruit of all sorts – strawberries, blueberries, raspberries, peaches – and I was looking for some way to preserve fruits without taking up my  disappearing freezer space. These cherries were hardly ‘local’, as we don’t see many of them in New England, but they were from about as close they get – probably mid-east coast.  But during a visit to bike in the Veneto last May, I discovered the cherries of Marostica, and saw how those made their way into the cuisine of the season. I had done peaches in a sweetened brandy liquid the preceding fall, and thought a similar technique would work well  with cherries, using a combination of red wine with a little grappa kick -certainly more Italian! I threw in some orange juice and rind for a little acidity, and added some spice with a few cloves.

I found that canning the cherries, or canning just about anything, is only step one of the process. What remains is how to use what you canned. Up until  this point, canned cherries were something that I rarely ever use, and now I had a dozen or so cans. What to do with them? So I came up with this cherry wine sauce that I paired with rack of lamb. It would also work well with a pepper-encrusted beef tenderloin.

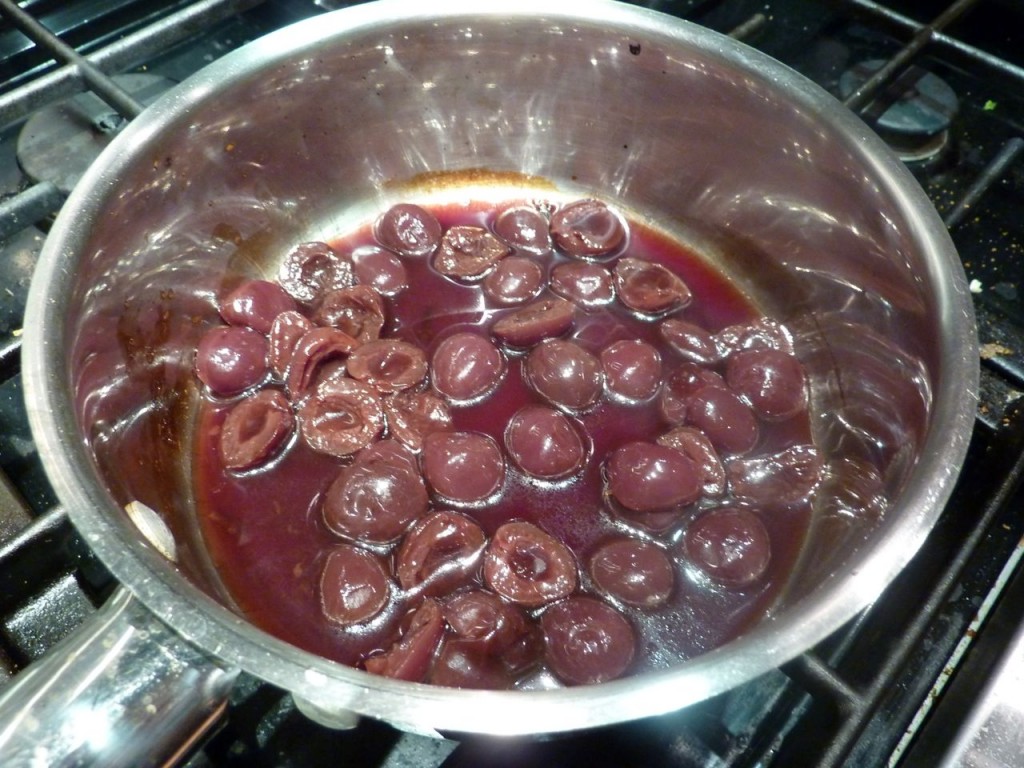
reduced sauce ski holidays dolomites
Reduced sauce with cherries

The wine sauce is easy once you have the canned cherries in wine on hand – I simply drained the wine ‘juice’ off of the cherries into a saucepan, added beef stock and a little balsamic, and reduced. I just needed to season it a bit with salt and pepper. This can all be done in advance, and just reheated when you are ready to serve. For those of you who don’t have the luxury of nice canned cherries available, I’ve include a version that uses fresh. I’ve added a few ingredients to the sauce to recreate the flavors from the original wine ‘juice’ I used in the canning process.

crust on lamb cycling tours dolomites
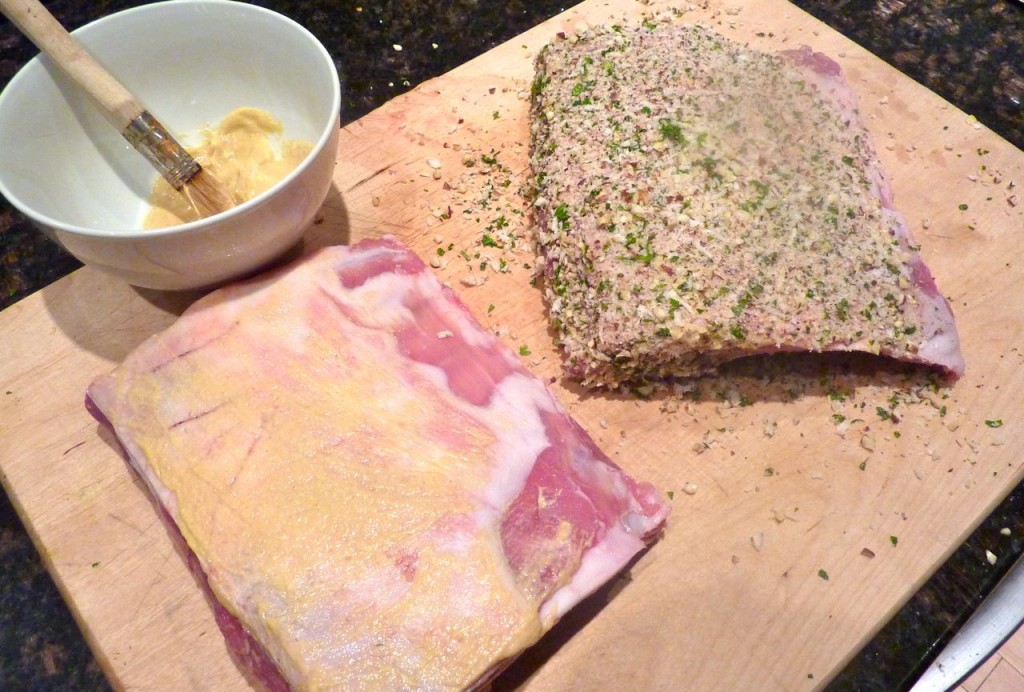
Putting crust on the lamb

The lamb I had purchased at the Newburyport Farmer’s Market that runs every Sunday between May and November in Newburyport, MA. It is locally raised in Epping, NH at Riverslea Farm. I thought a crust with hazelnuts, breadcrumbs, with some zest from dijon and a taste of horseradish would work nicely with the sweetness of the cherries. The crust can be prepared and applied to the lamb in advance, just place the coated racks on a sheet pan and keep in your frig until ready to cook.

I served these with some sauteed greens (chard and russian kale), and fried parsnip parsnip cakes. A Valpolicella paired nicely with it; a good Pinot Noir would work well too. And the canned cherries are great served as is over almond ice cream, with a little piece of dark chocolate.

Rack of Lamb with Hazelnut Crust and Cherry Sauce

Serves 4

For wine sauce:

1 pint canned cherries in wine OR 1 pint fresh cherries, cut in half and pitted

2 cups beef stock
2 tablespoons balsamic vinegar
kosher salt and freshly ground pepper

 
and, if using fresh cherries:
1 cup red wine
1 tablespoon honey
1/2 cup orange juice
4 cloves

For lamb:

3/4 cup finely chopped hazelnuts
1/2 cup dry breadcrumbs
2 tablespoons horseradish
1/4 cup finely chopped parsley
1 tablespoon chopped fresh thyme leaves
Kosher salt and freshly ground pepper
1/2 cup dijon mustard
2 racks of lamb

For the sauce (this can be done in advance, and reheated just before serving)

If using canned cherries in wine, place a strainer over a medium saucepan and pour the canned cherries into the strainer, allowing the wine sauce to flow into the pan. Set the cherries aside in a small bowl. Add the stock and vinegar. Skip the next paragraph and proceed to the instructions on reducing the sauce.

If using fresh cherries, combine the stock, balsamic vinegar, red wine, honey, orange juice and cloves in a medium saucepan.

Bring to a boil over high heat, reduce heat to medium and reduce to 1/2 cup. If there are cloves in the pan, remove them. Season with salt and pepper. Add the cherries. Reserve until lamb is done.

For the lamb:

Preheat oven to 375°.

Combine the hazelnuts, breadcrumbs, horseradish, parsley and thyme in a small bowl. Season with salt and pepper.

Brush the lamb on all sides with the dijon mustard, except for any exposed bone portion of the rack. Press the hazelnut breadcrumb mixture into the mustard to form a crust. Place the racks on a sheet pan, with the more heavily crusted side up.

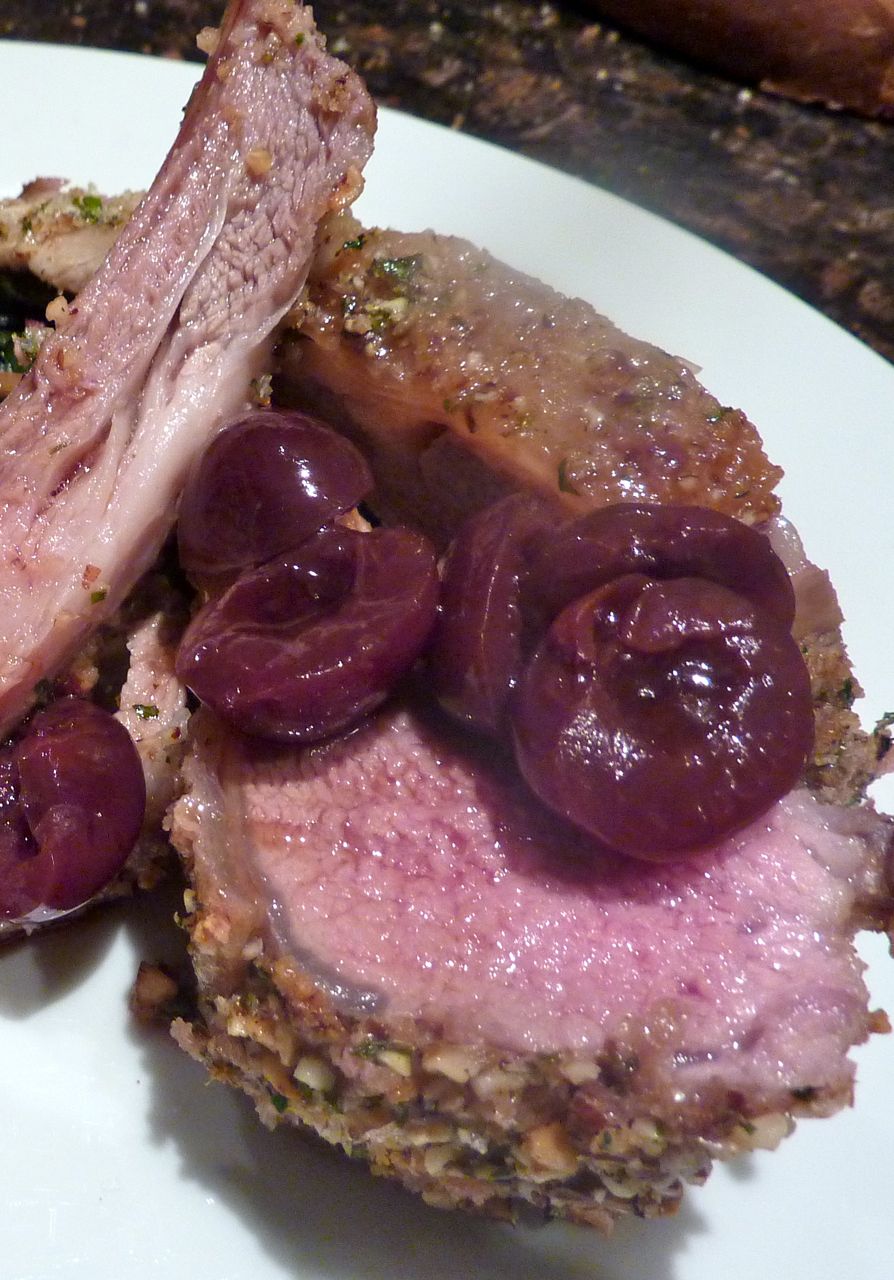
Roast in the oven until the internal temperature reaches 130°. Remove from oven. Cut into individual chops, place on 4 plates and top with cherries and a spoonful of sauce.

Posted in Cherries, Lamb, Meats, Uncategorized | Tagged , , , , , , , , , , , , , , , , , | 1 Comment

Pasta with Artichokes and Mascarpone

penne with artichokes bike tours italy
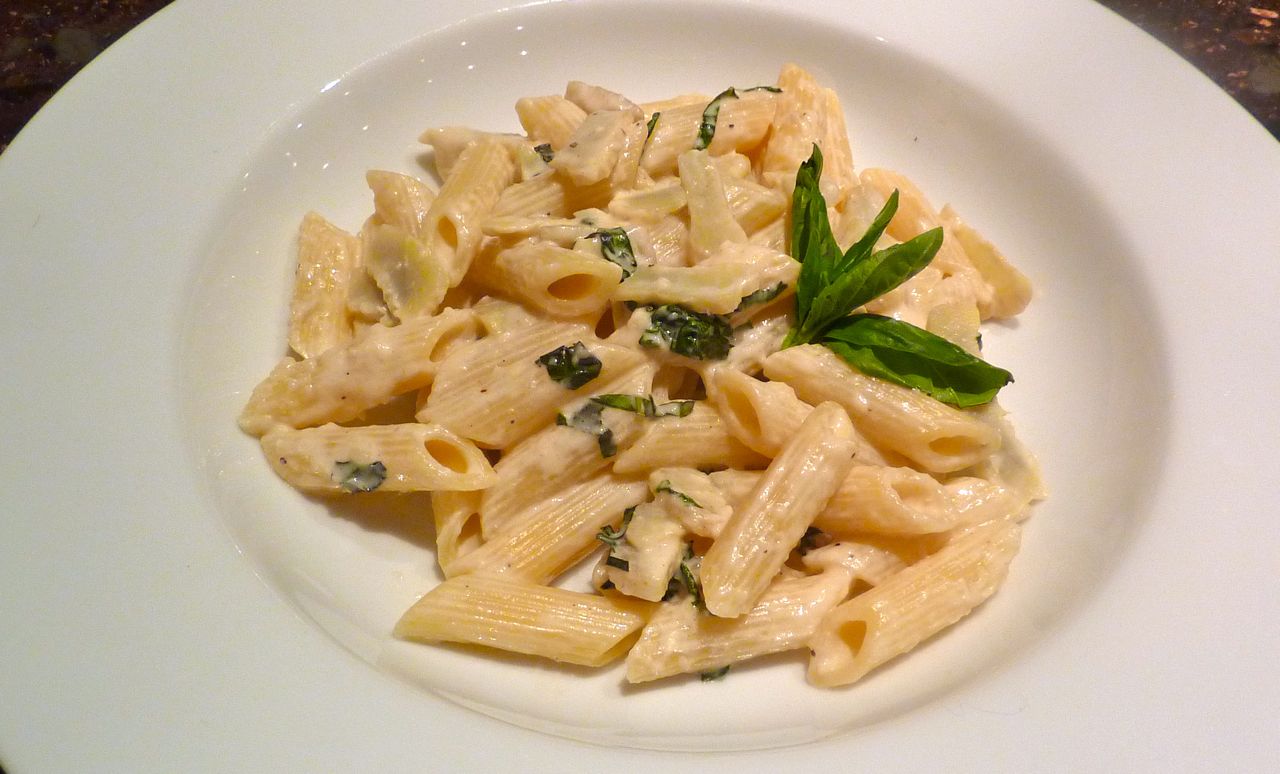
Penne with Artichokes and Mascarpone

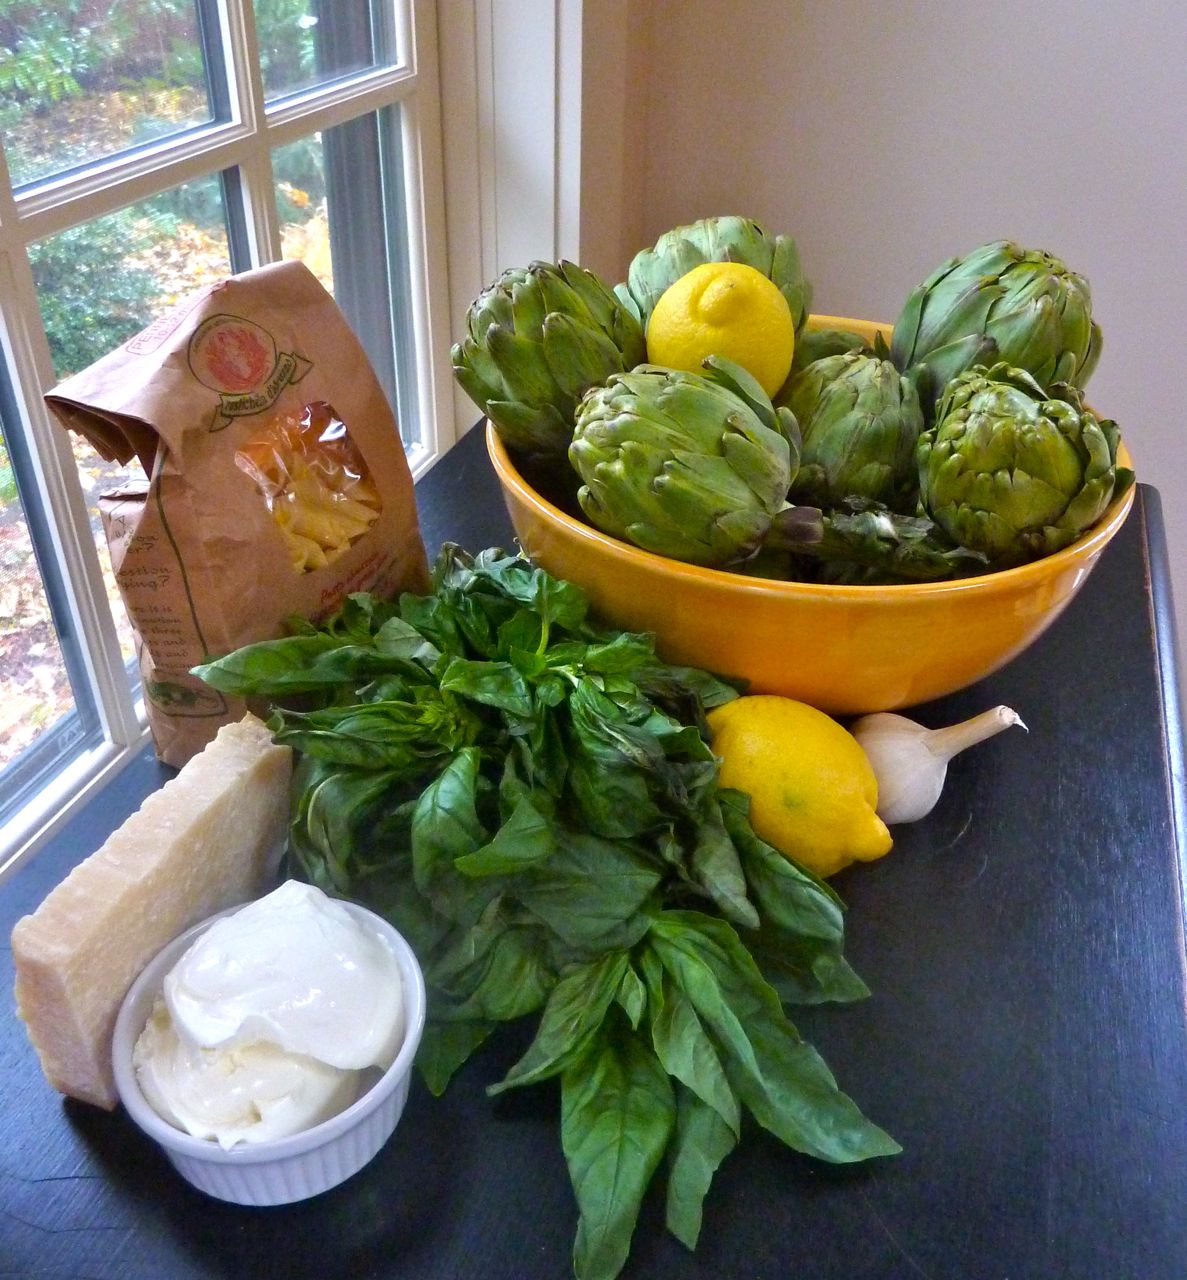
This recipe had several inspirations – first of all, the discovery of LOCAL artichokes at Tendercrop Farm in Newbury, MA. A first for me in New England, I must say! Second, the markets we see along our bike tours of the Veneto with their wide variety of artichokes, including tubs full of trimmed hearts, allowing the cook to enjoy fresh artichoke hearts without the labor intensive preparation. Thirdly, looking through The Splendid Table, by Lynne Rosetto Kasper, an award winning cookbook on the cuisine of Emilia Romagna, I discovered a recipe for tortelloni stuffed with artichokes and mascarpone. Well, trimming the artichokes was enough labor for me, so instead of a stuffed pasta I applied the same combination to create a sauce that I then served over penne rigate. If you use canned artichoke hearts, this becomes a very simple, quick recipe.

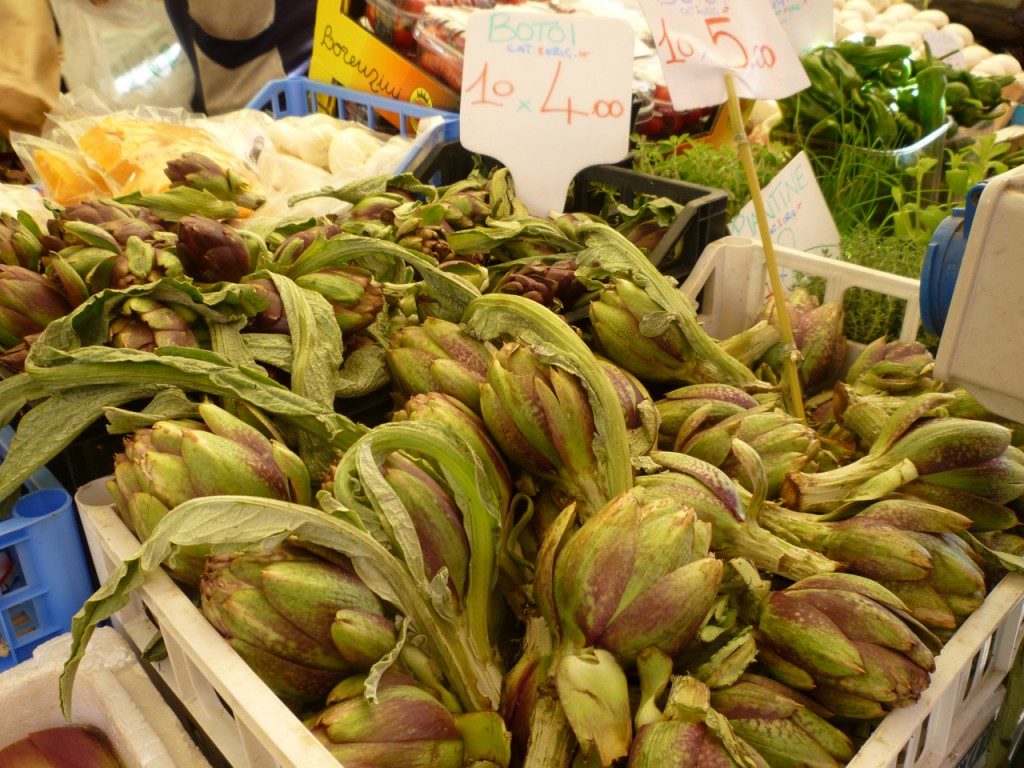
artichokes in market italy bike tours
Artichokes in Rialto market, Venice

Lynne Rosetto Kasper developed her stuffed tortelloni recipe to reproduce the original which she discovered in Tamburini, a gourmet store in Bologna. Their pasta stuffing was a combination of artichokes, mascarpone, and fresh white truffles. If you are lucky enough to have a white truffle, you could shave that on top of the pasta – for those of us without a pig, I’ve suggested a drizzle of white truffle oil as a final garnish.

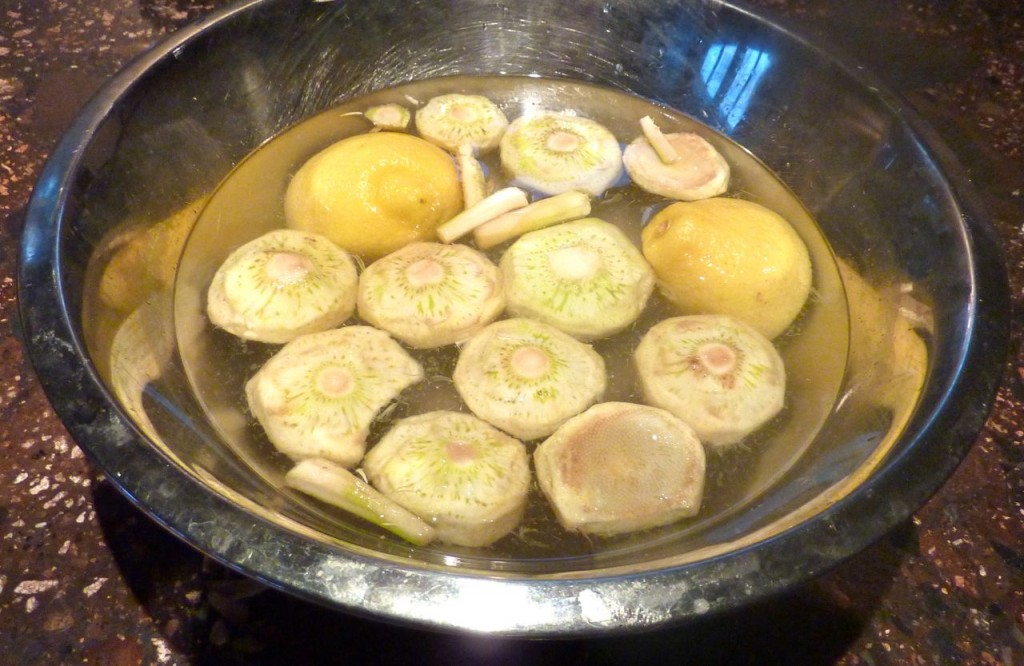
hearts in acidulated water culinary bike tours
Artichoke hearts in acidulated water

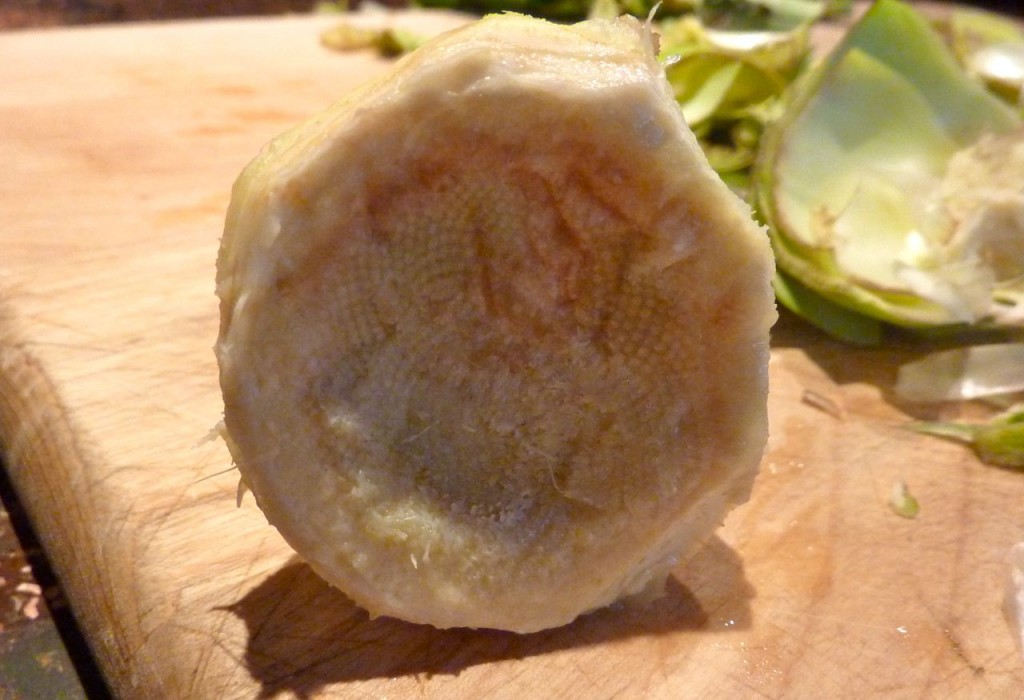
On our Italiaoutdoors Food and Wine web site, I am compiling some details on the foods and wine of the regions in Northern Italy. I just added some background on artichokes, and there you will find a description and pictures of how to trim the artichokes for cooking, just as they do in the markets of the Veneto.

trimmed artichoke heart cycling dolomites
Trimmed artichoke heart

For another pasta with artichoke recipe, check out Oui, Chef for a great version with shrimp.

Pasta with Artichokes and Mascarpone (Penne con Carciofi e Mascarpone)

Serves 4 as a first course

8 trimmed, raw artichoke hearts, soaking in 1 1/2 cups acidulated water
3/4 cup white wine
2 cloves garlic, smashed
Sprig of basil
Sprig of mint

 
or:

 
8 canned artichoke hearts
1 tablespoon lemon juice

for both:

6 ounces mascarpone
1 clove garlic, minced
3/4 cup grated Parmigiano-Reggiano cheese
10 leaves basil, chiffonade (thinly sliced)
Kosher salt and freshly ground pepper
1 pound penne rigate or similar dried pasta
4 small whole basil leaves
White truffle oil (optional)

If you are using raw artichoke hearts, you must cook them before continuing with the remainder of the recipe. If you are using canned hearts, you can skip on to the step in which you slice the cooked artichokes.

For the fresh, raw artichoke version:

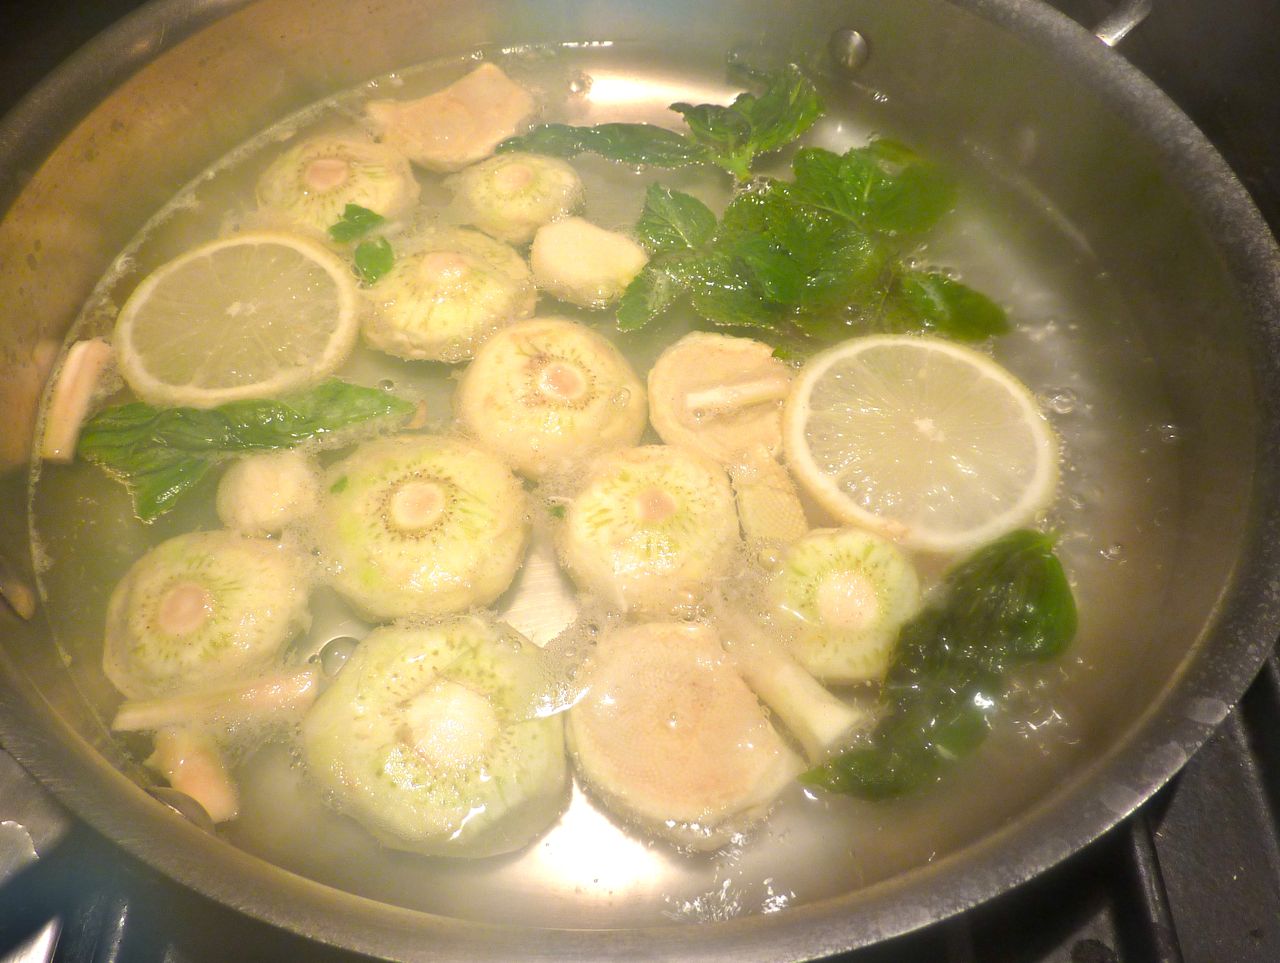
Place the 8 raw artichoke hearts and the acidulated water into a large saute pan. Add the white wine, garlic cloves, basil and mint. Bring to a boil, then reduce the heat and simmer until the hearts are tender enough to be pierced with a skewer, about 20-25 minutes. If your hearts are quite different in size, they may not all be done at the same time. As they finish cooking, remove the hearts and set aside. When all have been removed, use a slotted spoon to extract the garlic cloves and herbs from the cooking liquid. Increase the heat, and reduce the liquid to a glaze, 1 to 2 tablespoons.

For both canned and fresh versions:

Thinly slice the artichoke hearts.

Bring a large pot of water for the pasta to boil over high heat.

If using canned artichokes, add the 1 tablespoon lemon juice to a large saute pan. If using the raw artichokes, use the saute pan in which you cooked the artichokes, as the remaining glaze will replace the lemon juice. For either option, heat the pan over medium heat.

Add the mascarpone, stirring as it softens. Add the garlic and cook for 1 minute. Add the sliced artichoke hearts and the Parmegiano-Reggiano cheese. Stir until combined into a smooth sauce. Season with basil, salt and pepper.

When the pasta water is boiling, add salt, return to a boil, and then add the pasta. Cook until al dente. Remove and drain, reserving 1 cup of pasta cooking water. Add the drained pasta to the sauce in the saute pan, stirring to combine. If the sauce seems a bit thick, you can use a little of reserved pasta cooking water to loosen it up a bit, but this may not be necessary.

Serve in four bowls, garnished with a basil leaf and a drizzle of truffle oil.

Posted in Artichokes, Mascarpone, Pasta, Uncategorized | Tagged , , , , , , , , , , , , , , , , | 5 Comments